Tag Managers & Analytics Connectors
Installing Scoby Analytics on Google Tag Manager
This guide shows you how to integrate Scoby Analytics with your website using Google Tag Manager (GTM) where install Scoby Analytics using two different approaches:
- Client-side installation: The fastest way to get started. Ideal for simple setups or platforms that don’t support Server-side GTM. IP addresses are transmitted to Scoby Analytics but are immediately dropped by our privacy proxy before any processing.
- Server-side installation: Recommended for maximum privacy compliance, resilience, and control over your data. No personally identifiable information (PII) is transmitted to Scoby Analytics at any point.
Both methods follow Scoby’s privacy-first approach, analyzing only minimal, non-identifiable data. This ensures compliance with current ePrivacy and GDPR requirements to operate under the legal basis of legitimate interest.
Prerequisites
Before you begin, make sure you have:
- A Scoby Analytics Workspace
- Your Workspace ID
- Access to Google Tag Manager (open it in a separate tab)
Installation
This guide shows you how to integrate Scoby Analytics with your website using Google Tag Manager (GTM).
We recommend using Server-side GTM whenever possible for optimal privacy compliance and data control. However, we also provide a Client-side setup for simpler use cases or platforms where Server-side GTM isn’t available.
Both methods follow Scoby’s privacy-first approach, analyzing only minimal, non-identifiable data. This ensures compliance with current ePrivacy and GDPR requirements to operate under the legal basis of legitimate interest.
GTM Client-side
This method installs Scoby Analytics as a Custom HTML tag in your GTM container. It’s quick to set up and works well on most websites.
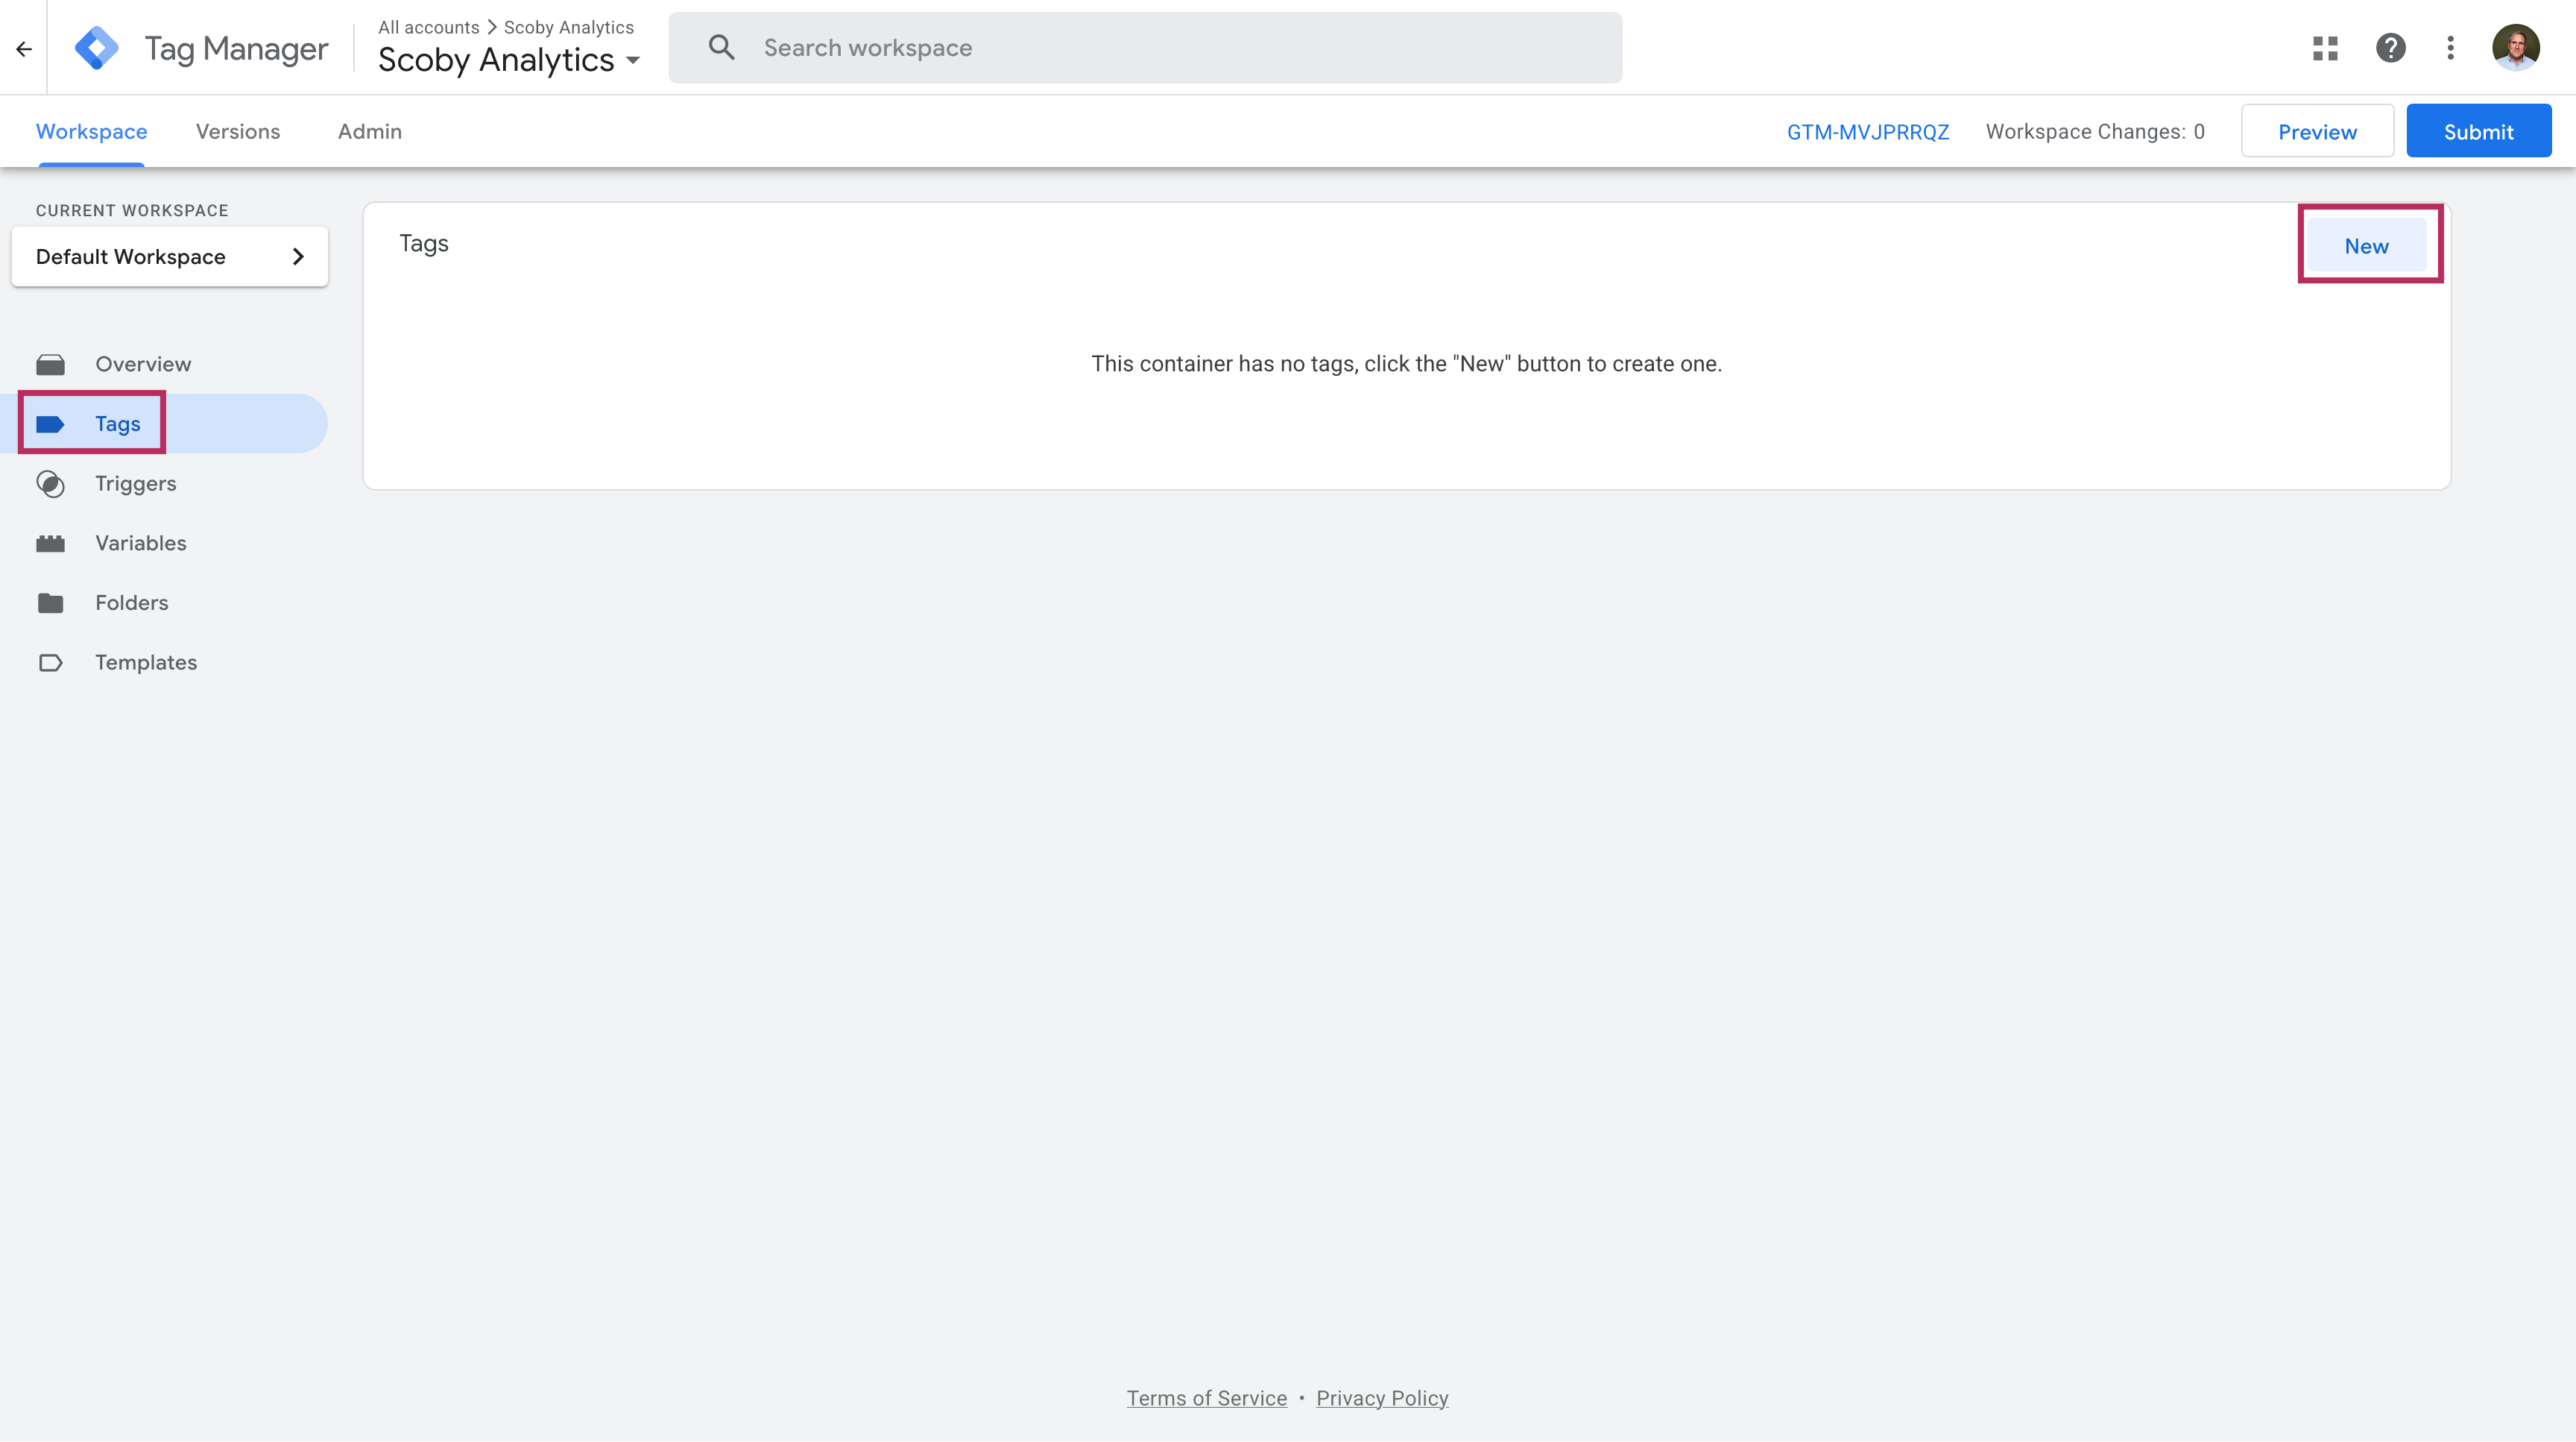
In your GTM workspace, click Add a new Tag.

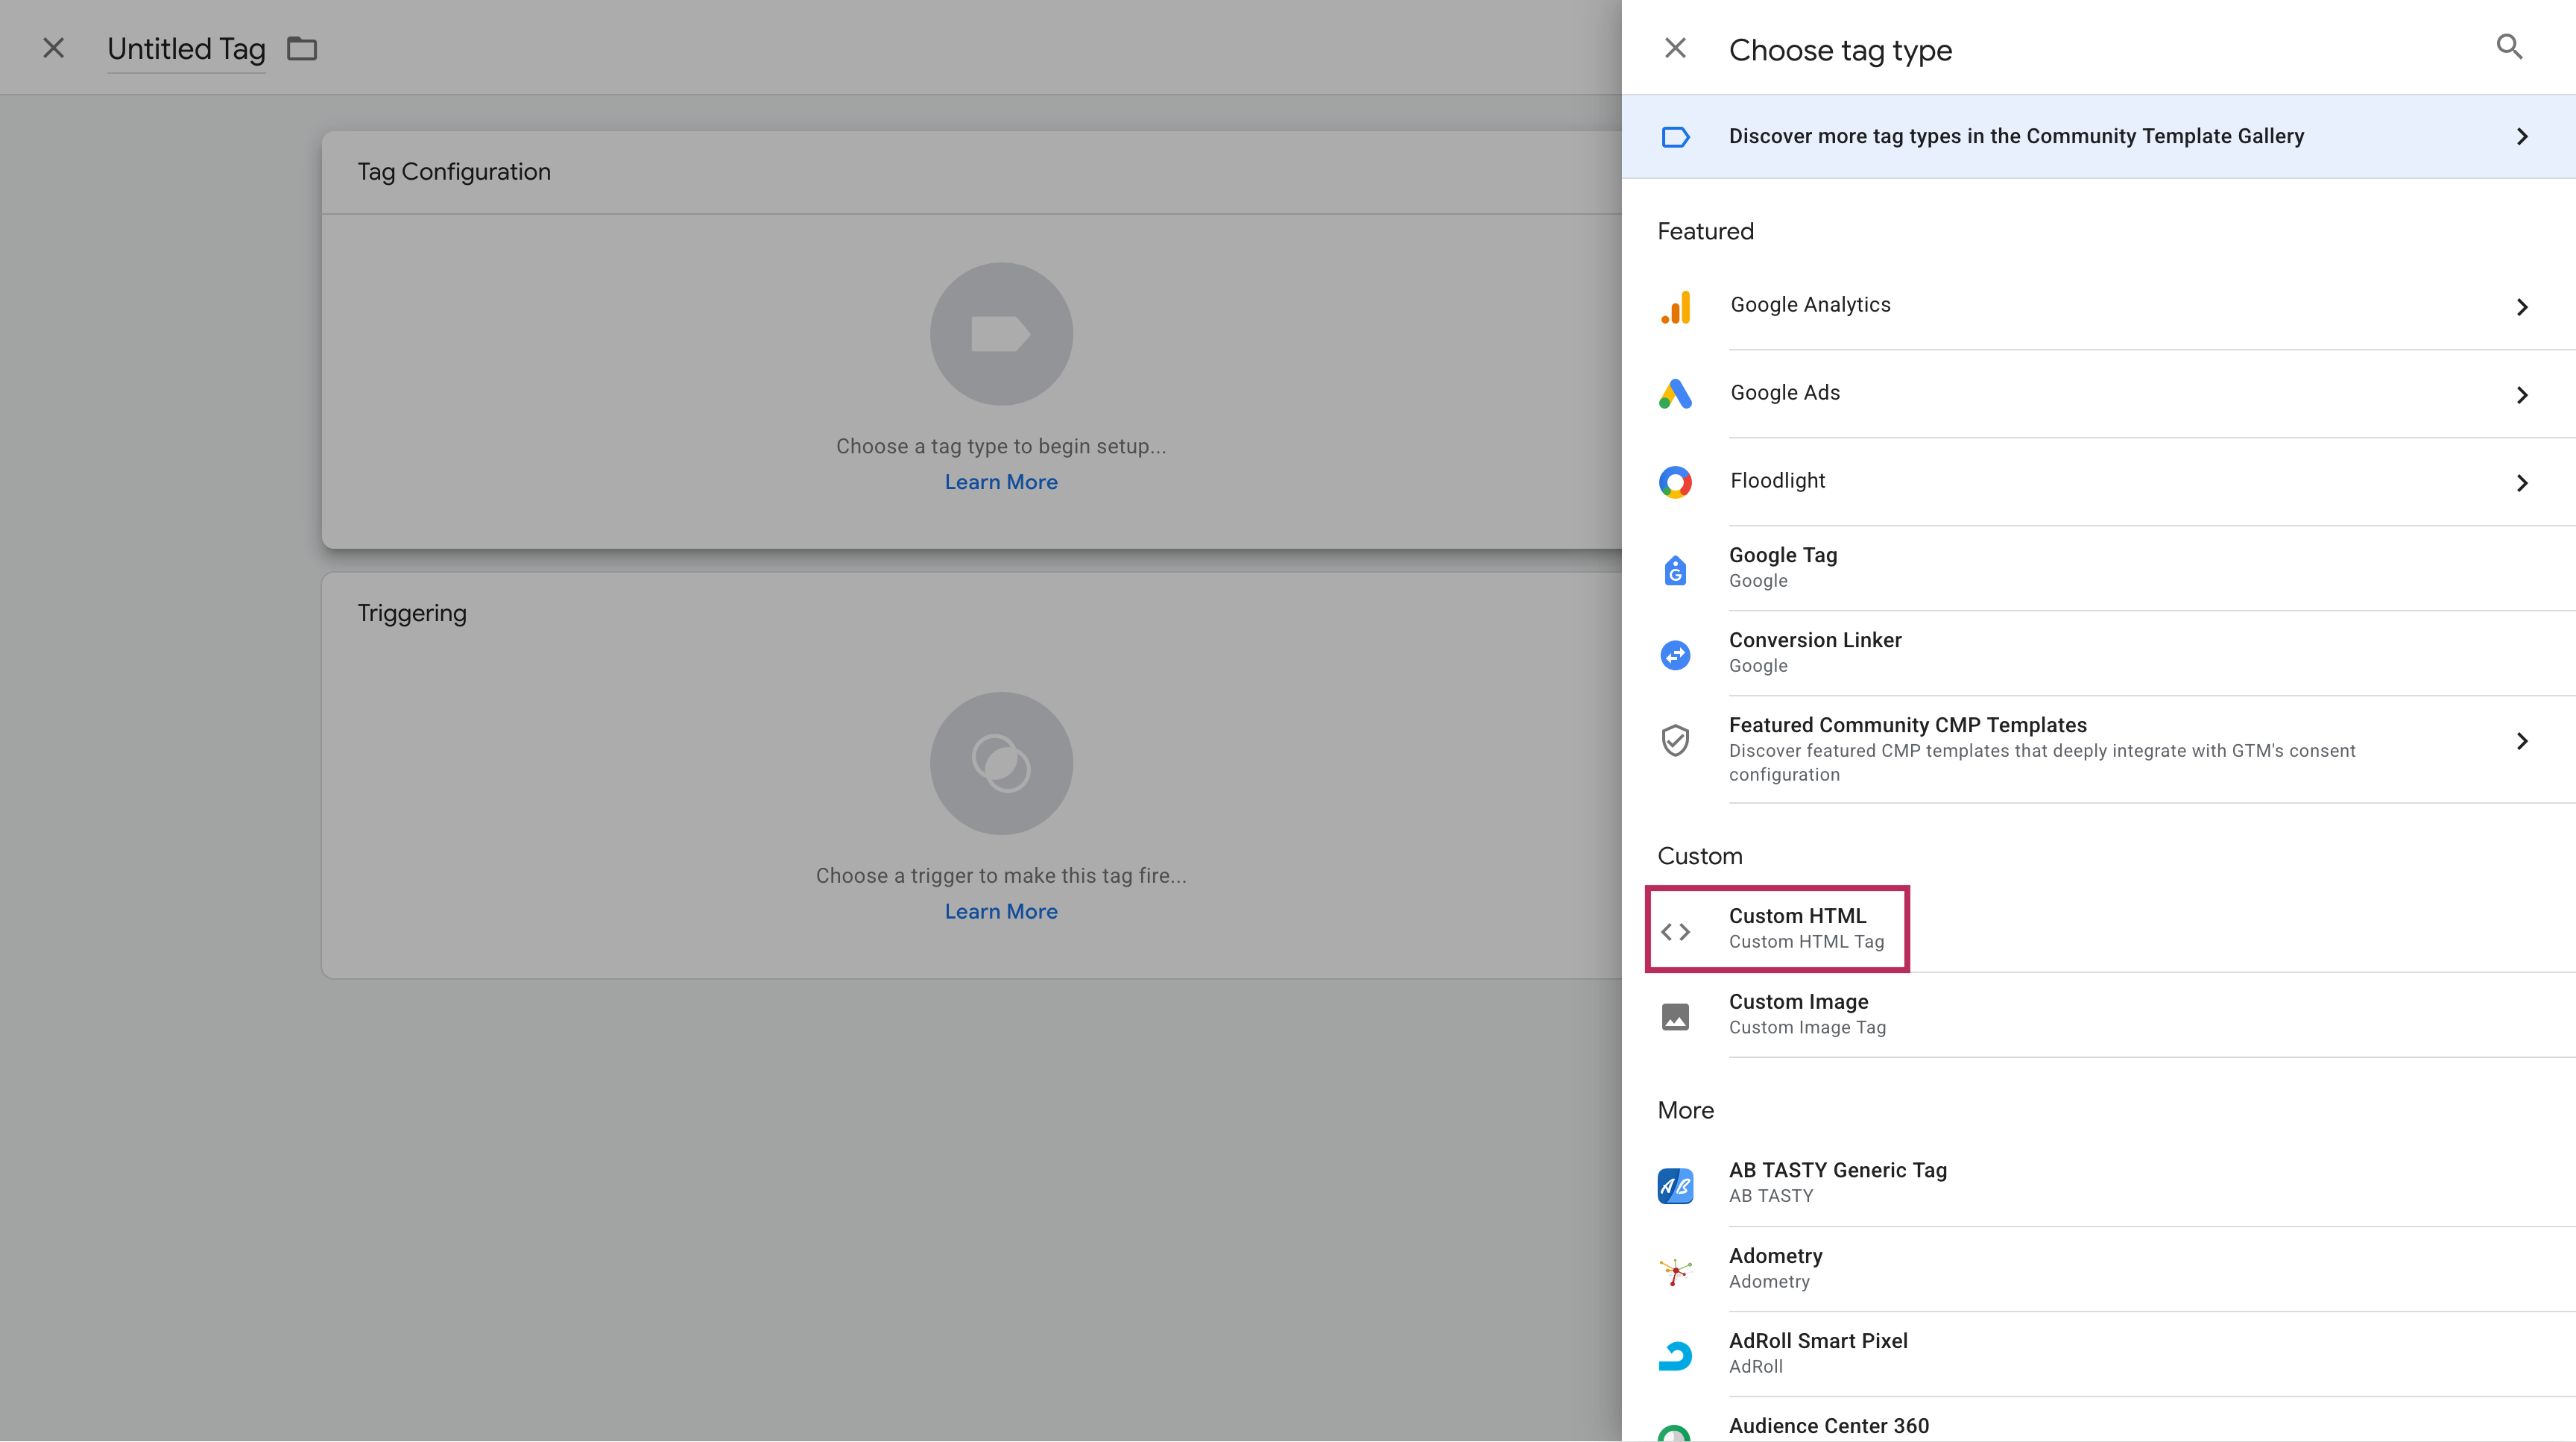
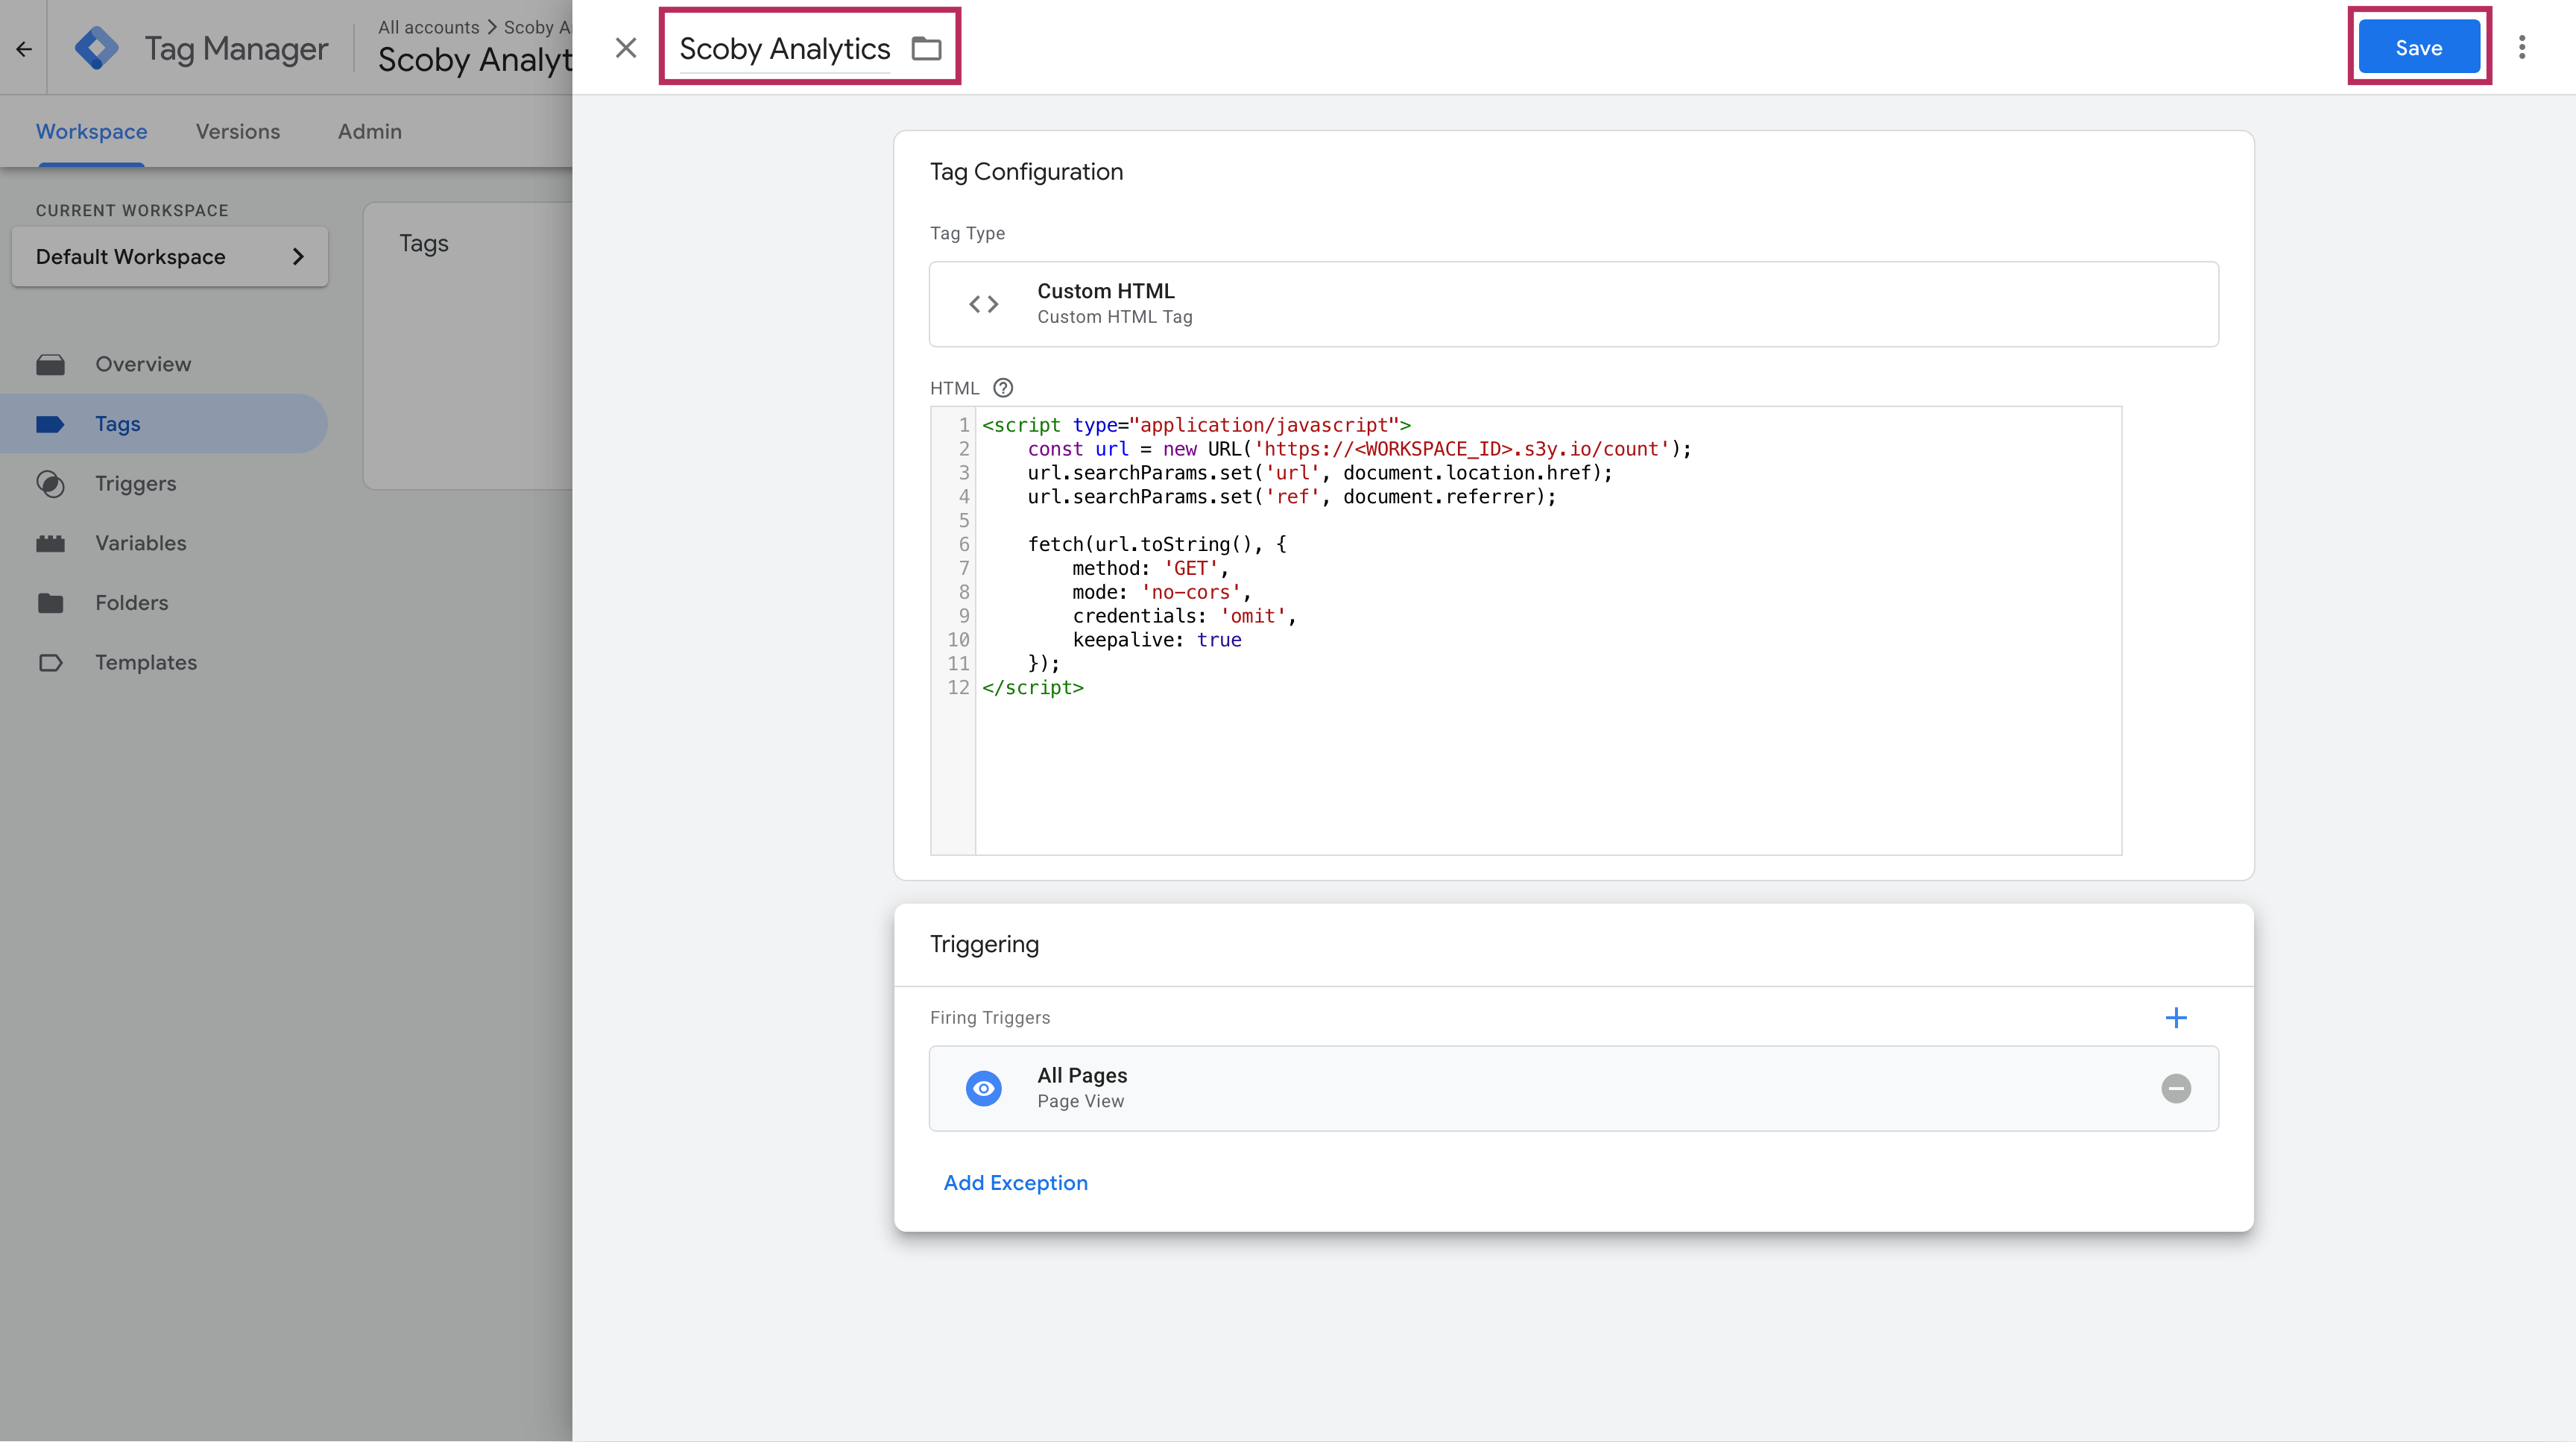
Click Tag Configuration to choose the tag type.

Select Custom HTML.

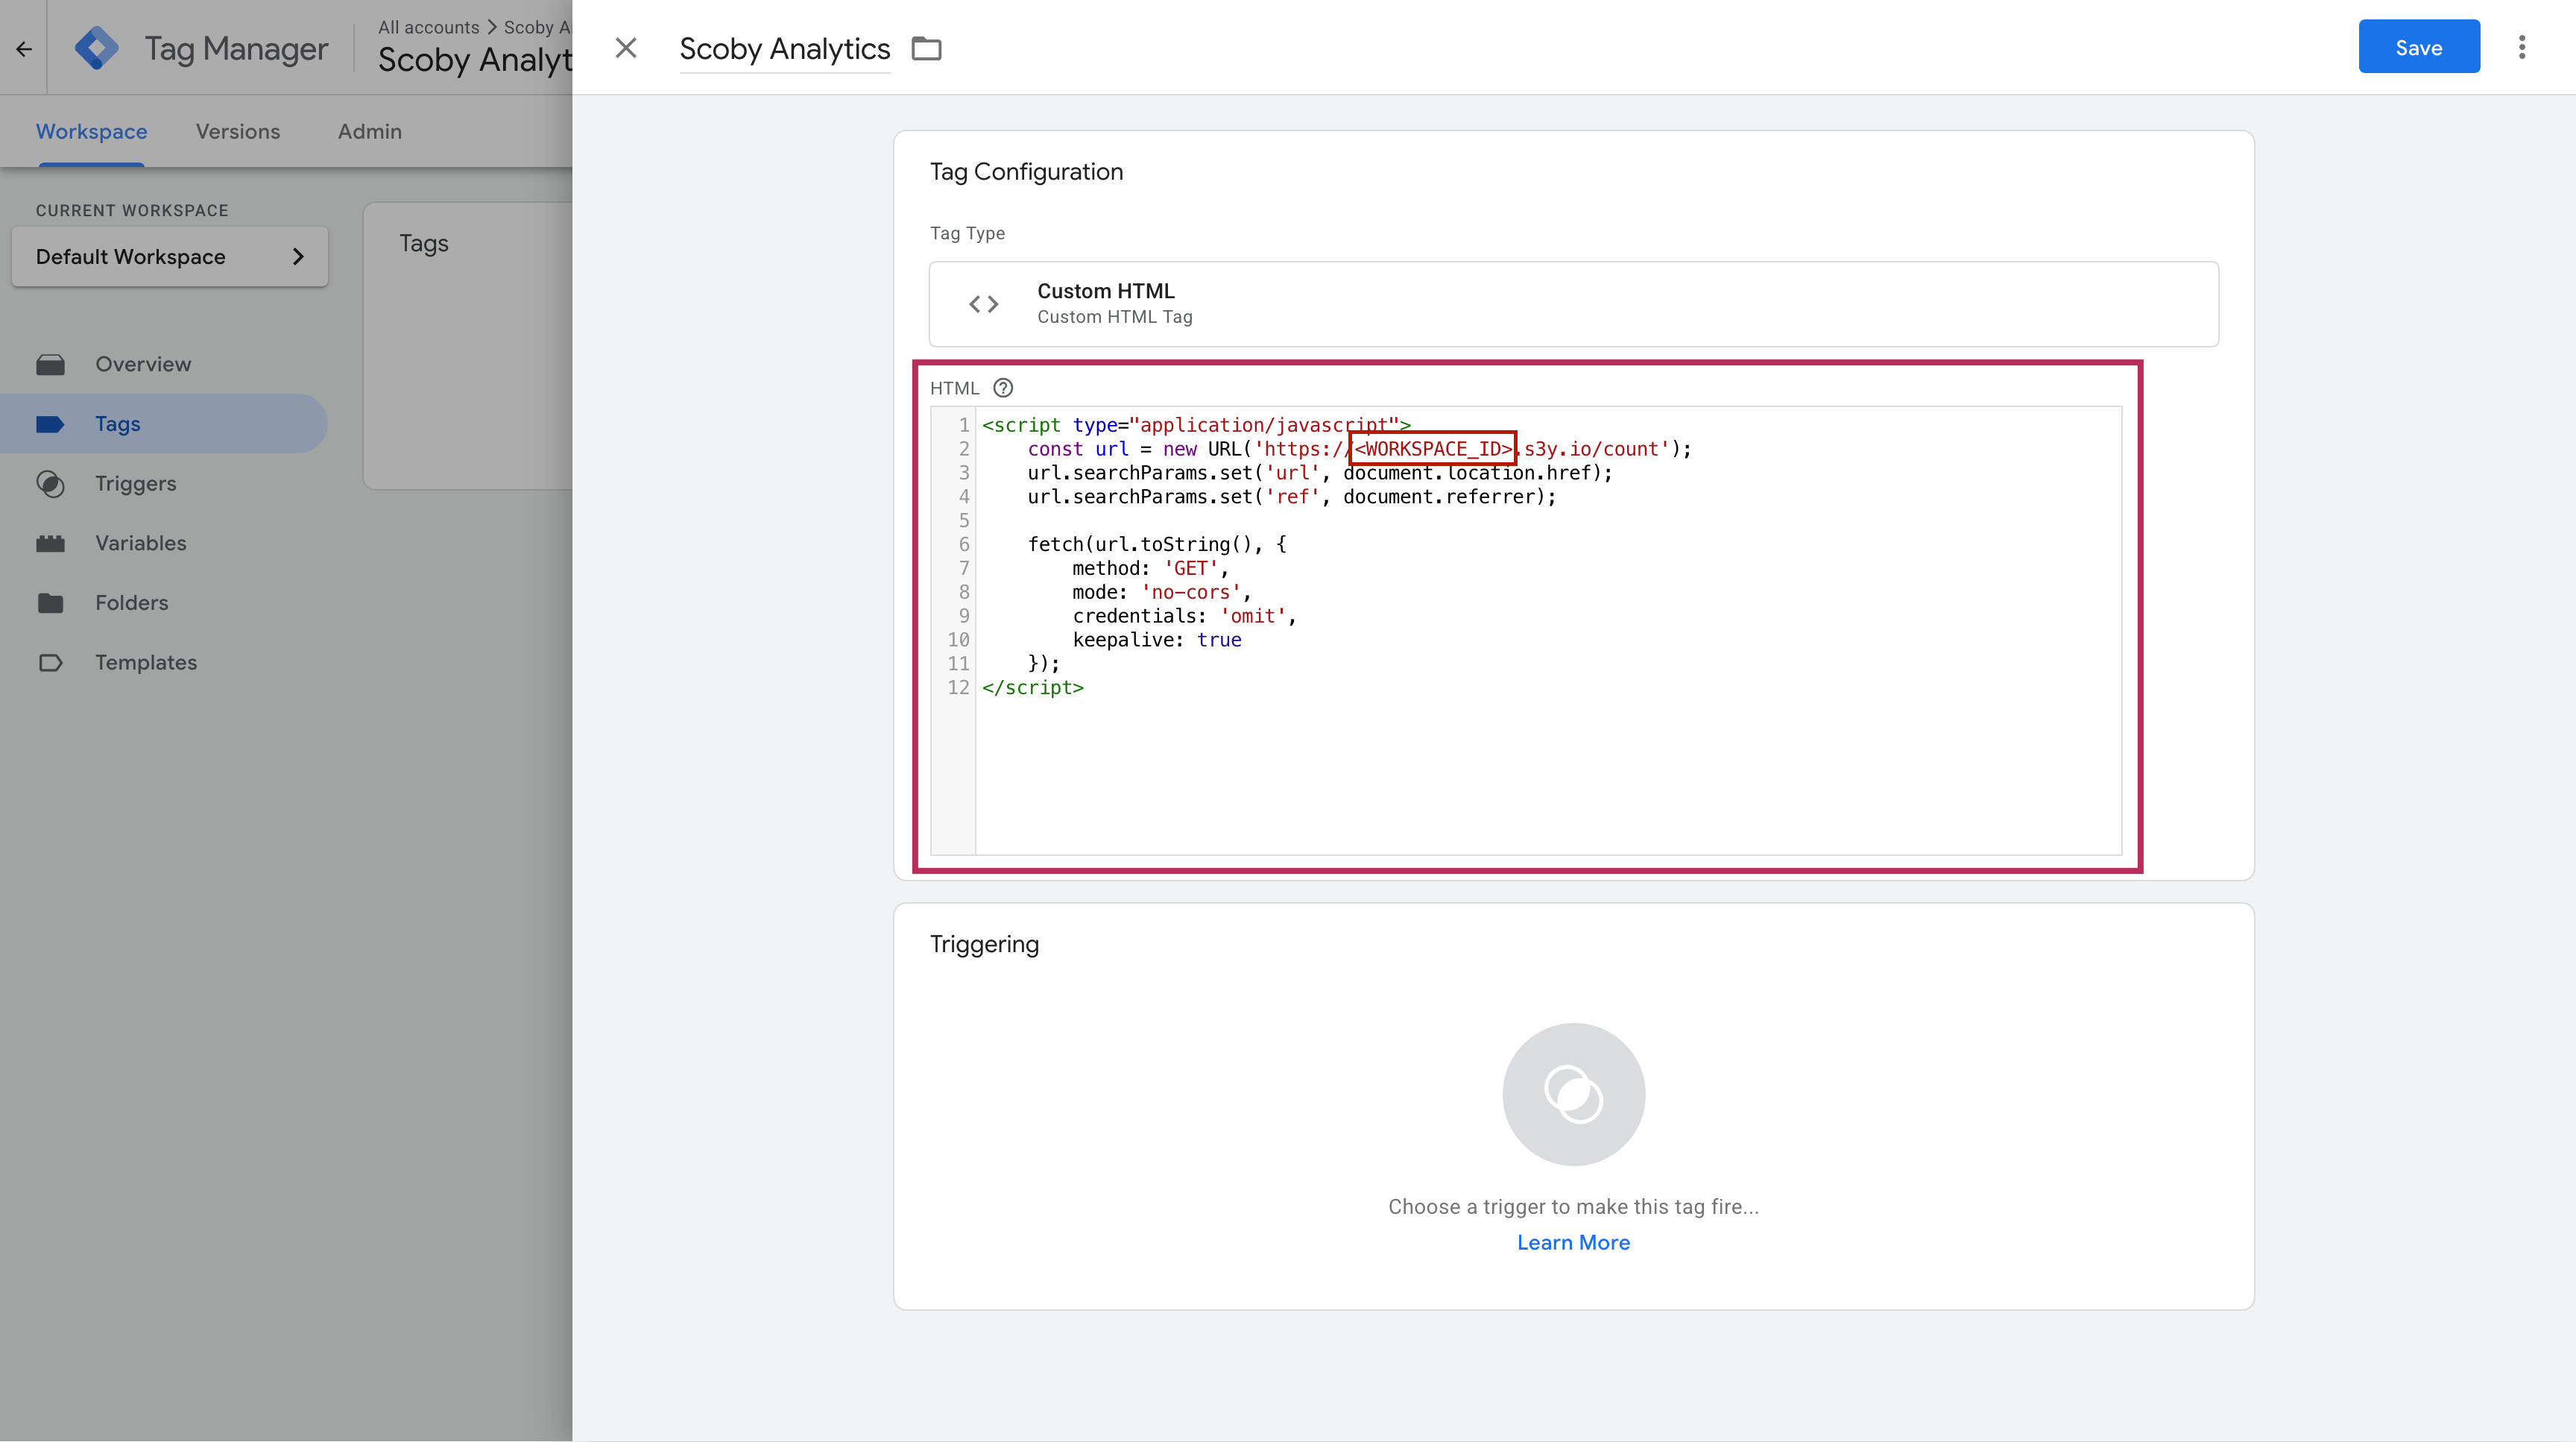
Copy and paste the following snippet into the HTML field.
Replace<WORKSPACE_ID>with your Workspace ID.

<script>
(function () {
  const workspaceId = "<WORKSPACE_ID>";

  window.scoby = window.scoby || function () {
    (window.scoby.q = window.scoby.q || []).push(arguments);
  };

  const script = document.createElement('script');
  script.src = `https://${workspaceId}.s3y.io`;

  document.head.append(script);
})();
</script>
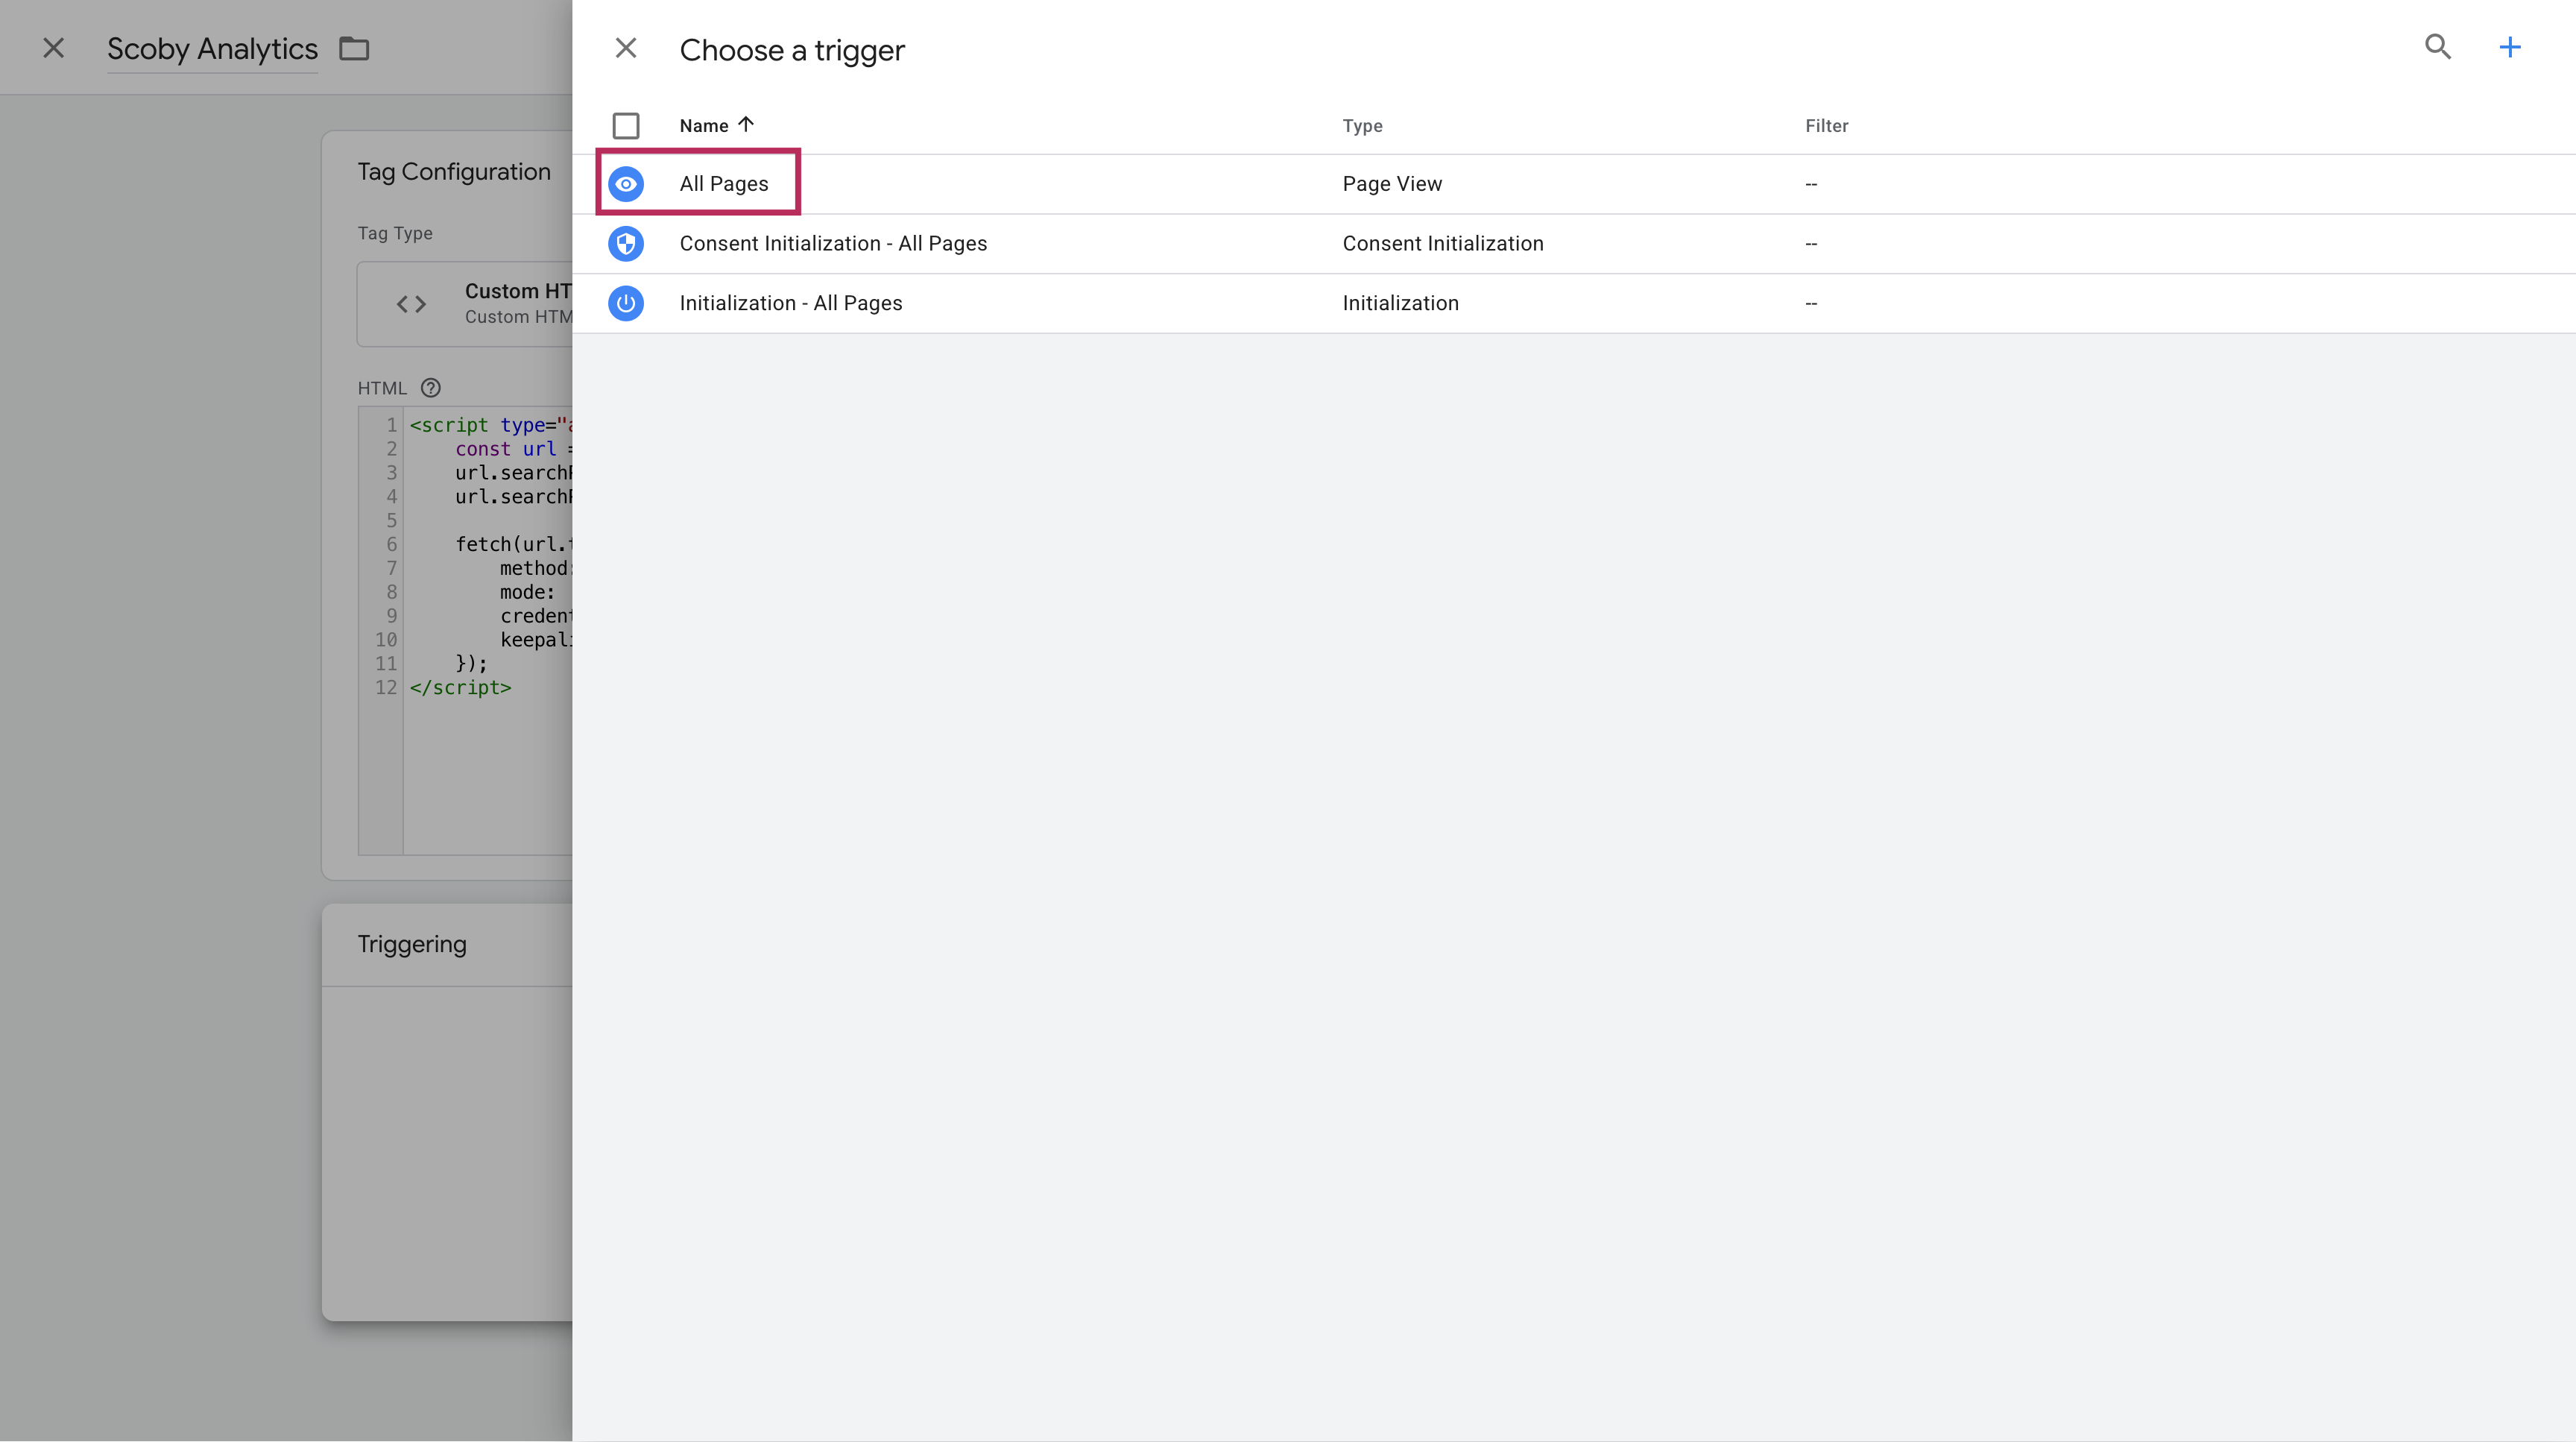
Under Triggering, add the All Pages trigger to fire the tag on every page.


Give the tag a clear name, such as
Scoby Analytics, and click Save.
Finally, Publish your container to make the tag live. That’s it — Scoby Analytics will begin collecting anonymous visit data, and your dashboard will show visitor statistics shortly after installation.

GTM Server-side
Special thanks to Markus Baersch for contributing the official Scoby Analytics Server-side GTM Template.
Use Server-side GTM for compliance and accuracy
For compliance with European data protection laws, we recommend installing Scoby Analytics in Server-side Google Tag Manager whenever possible.
Follow the official instructions to create a Server-side Container in GTM.
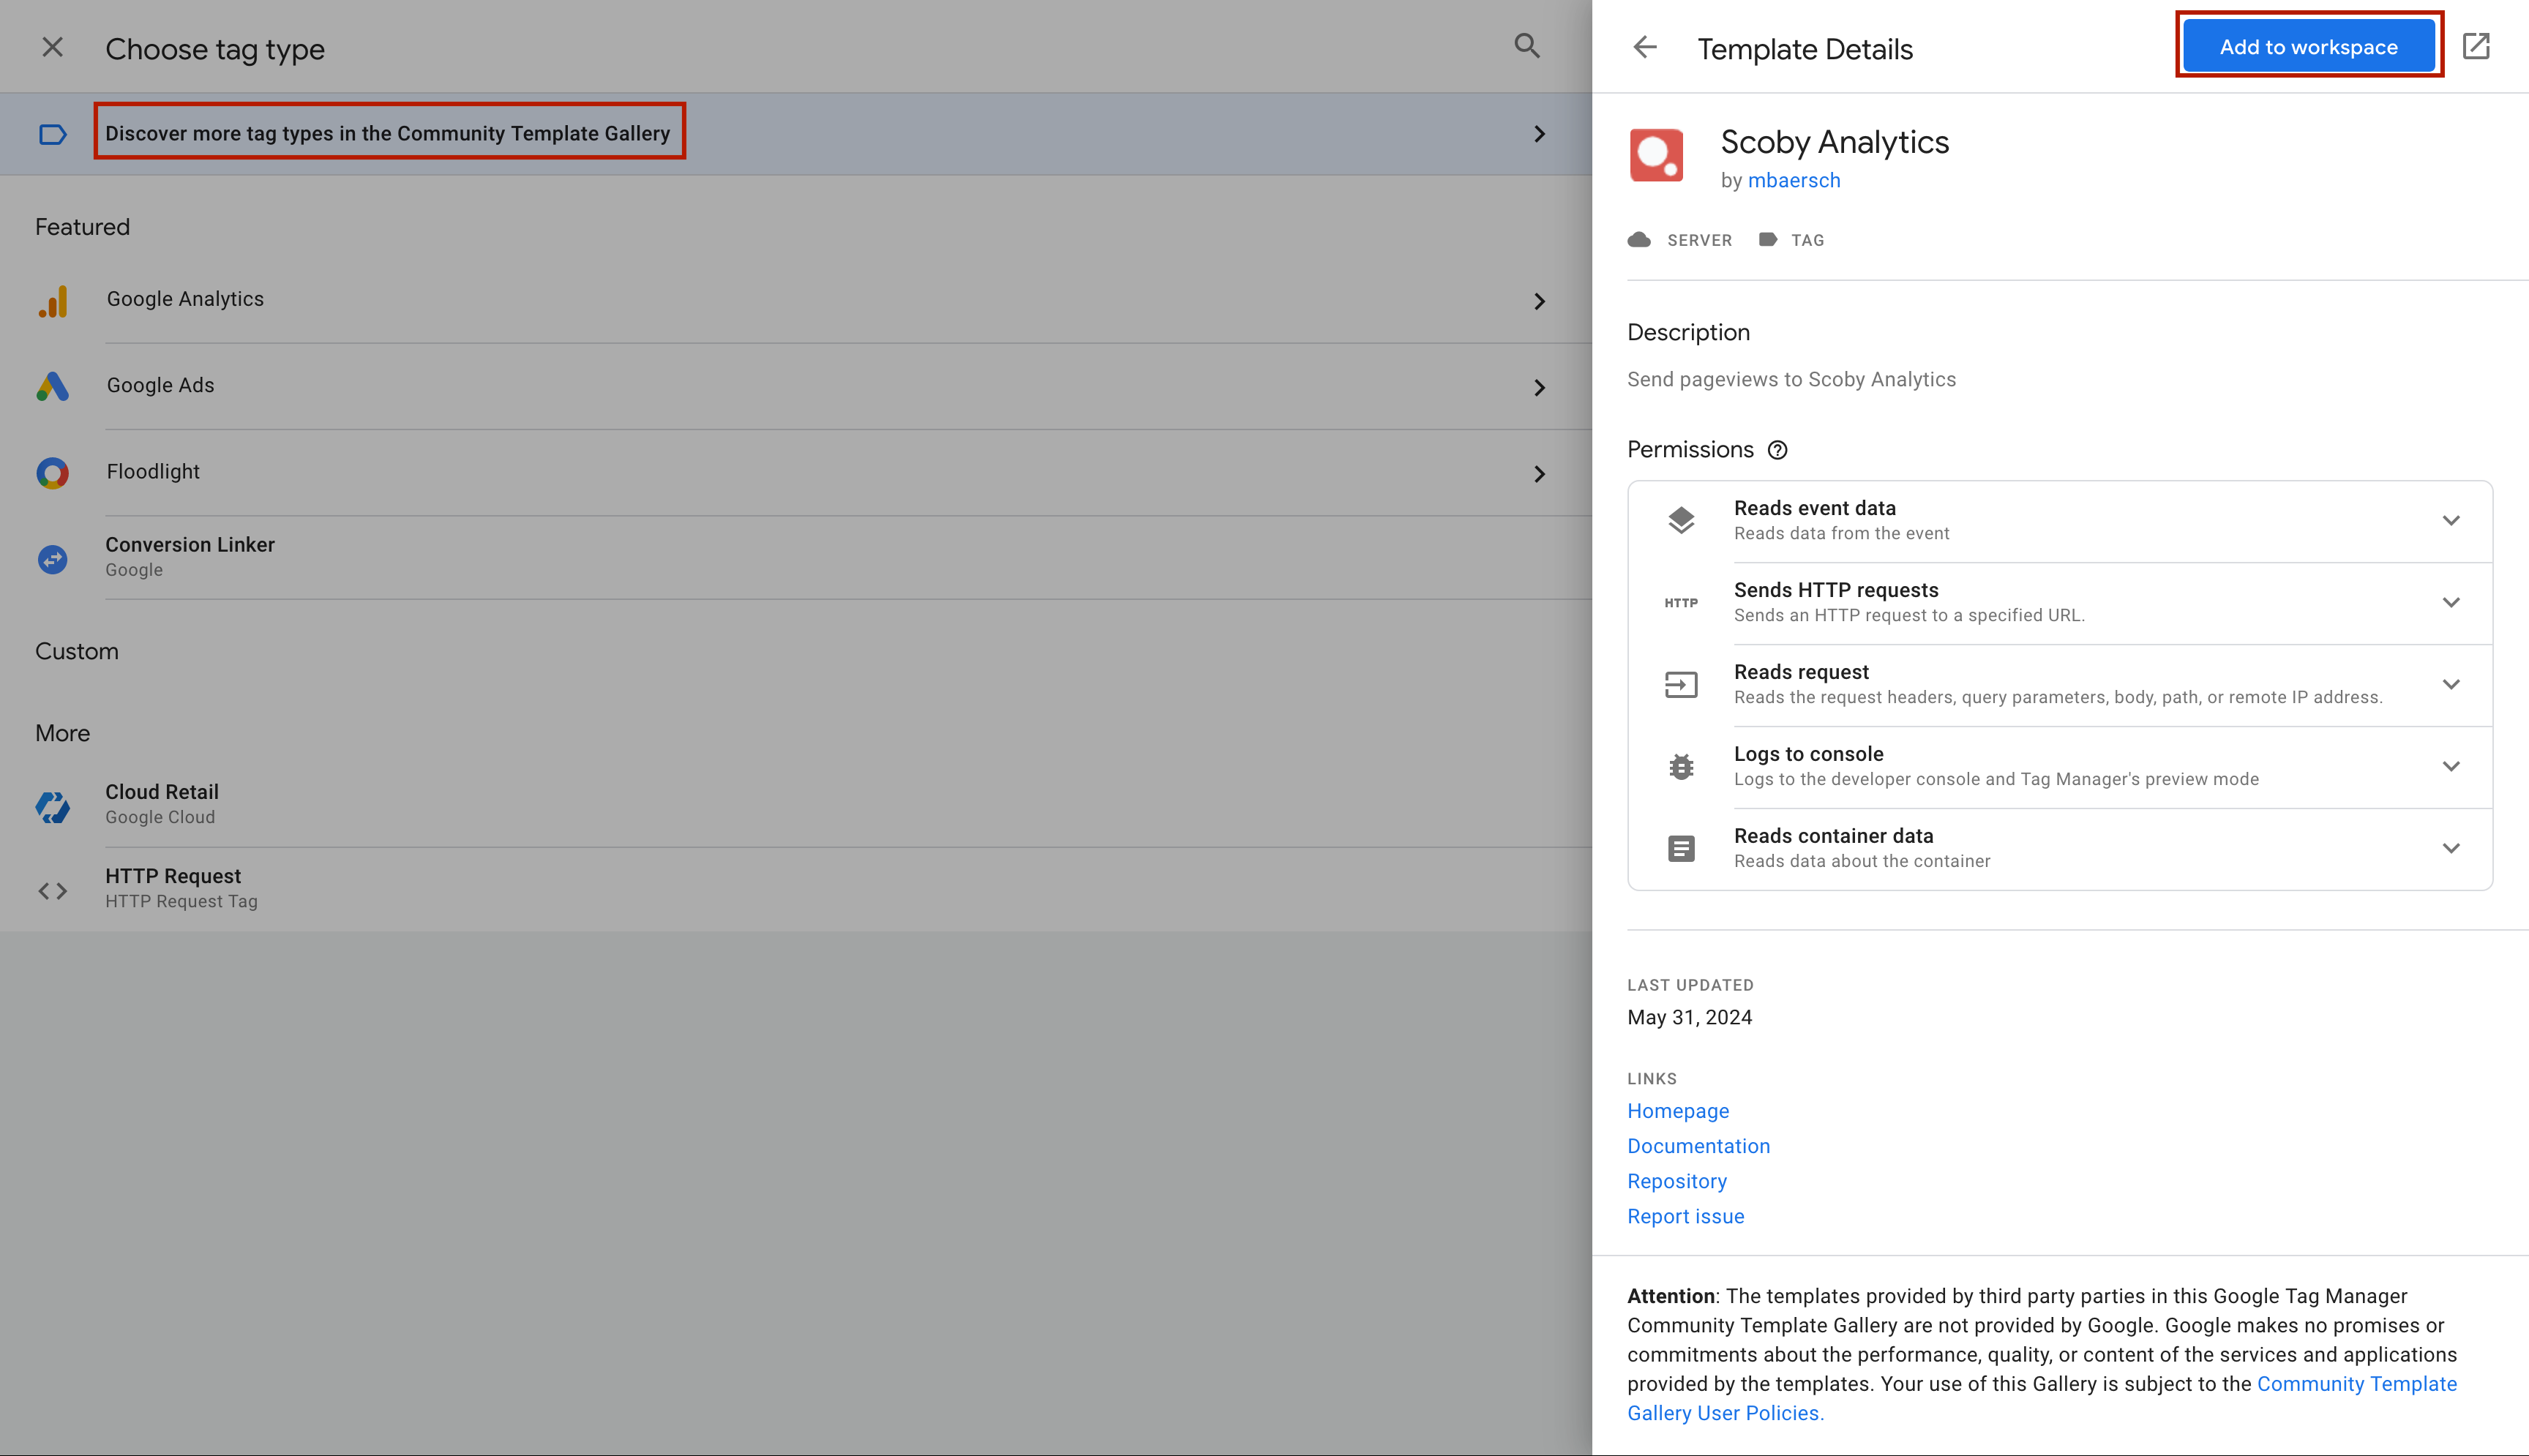
In your Server-side GTM workspace, open Templates → Search Gallery, find the Scoby Analytics Template, and add it to your workspace.

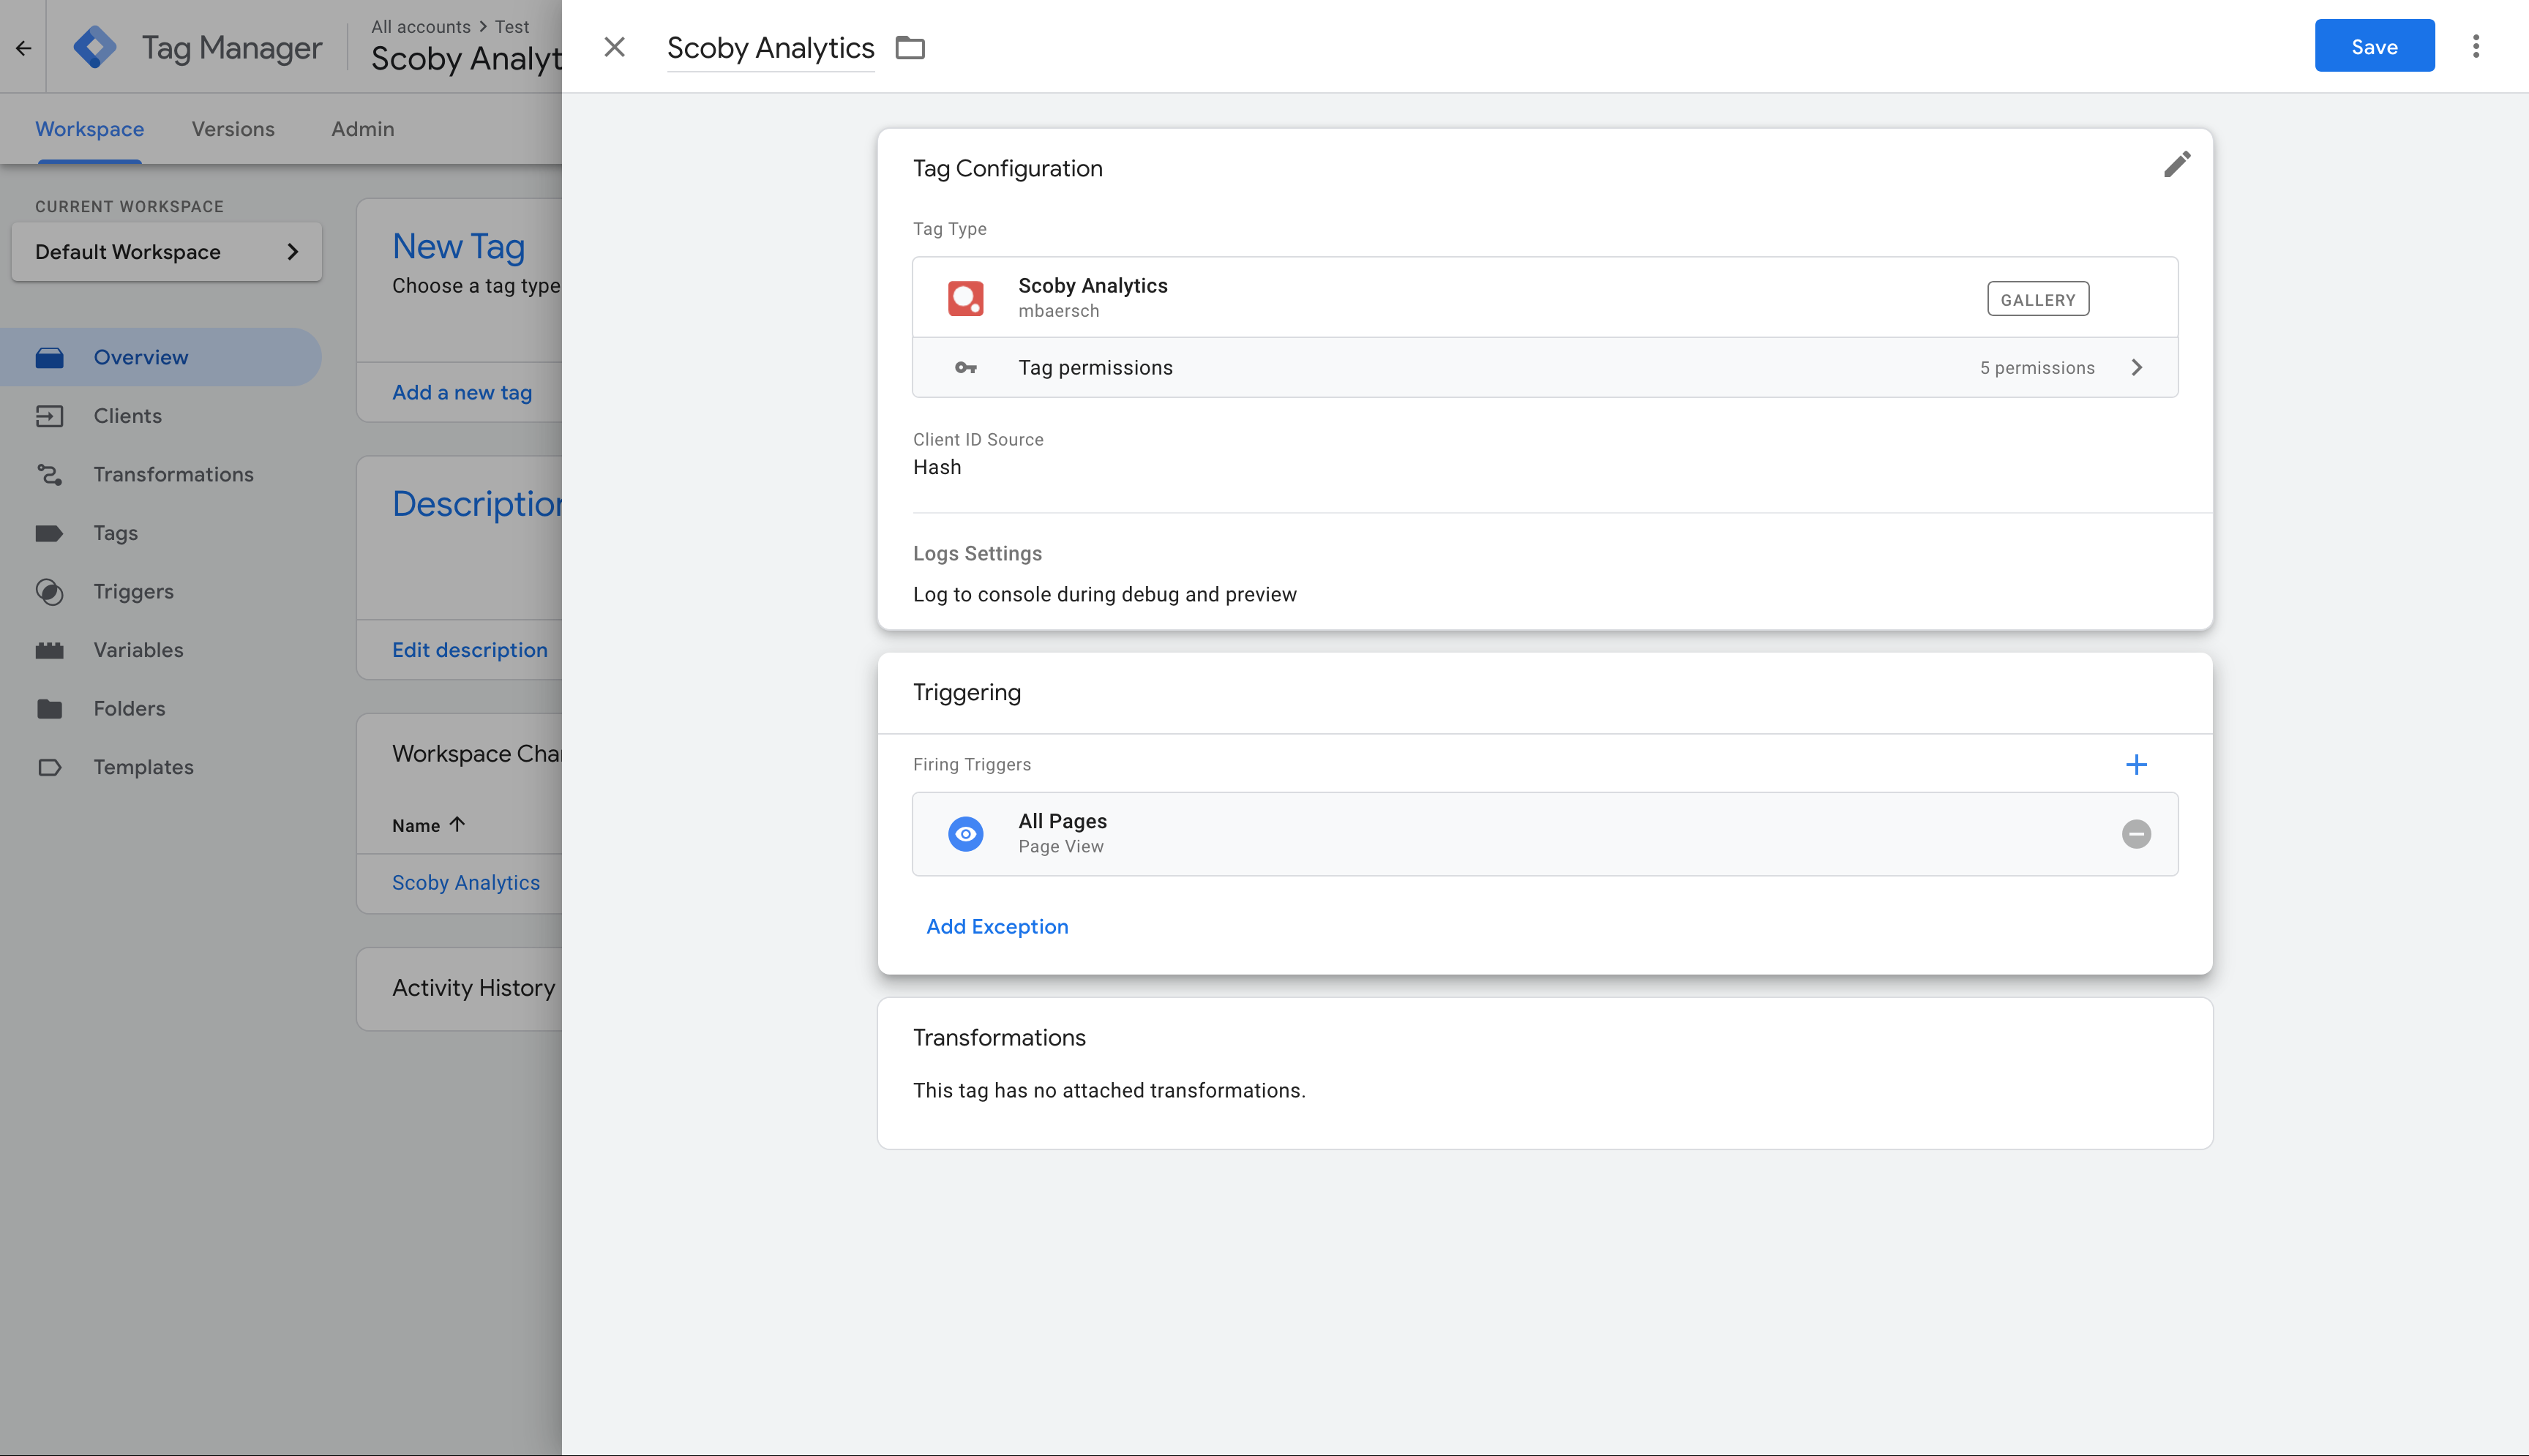
Obtain your Workspace License Key and enter it into the API Key field of the template configuration.
Generate a Secret Salt to anonymize incoming data, and enter it into the Salt field.

Add the All Pages trigger to measure all page views.

Publish your Server-side container.

You’re all set — Scoby Analytics will start collecting privacy-friendly analytics through your Server-side GTM setup. Data will appear in your dashboard shortly.