E-Commerce Platforms
Installing Scoby Analytics on Shopify
Like all Scoby integrations, this lightweight, client-side integration is carefully designed to prioritize visitor privacy. It fully complies with EU ePrivacy and GDPR regulations, while enabling you to exercise your legitimate interest in understanding how your website is being used.
Prerequisites
Before you start, make sure you have the following ready:
- A Scoby Analytics Workspace
- Your Workspace ID
- Access to your Shopify Admin (open it in a separate browser tab)
Installation Guide
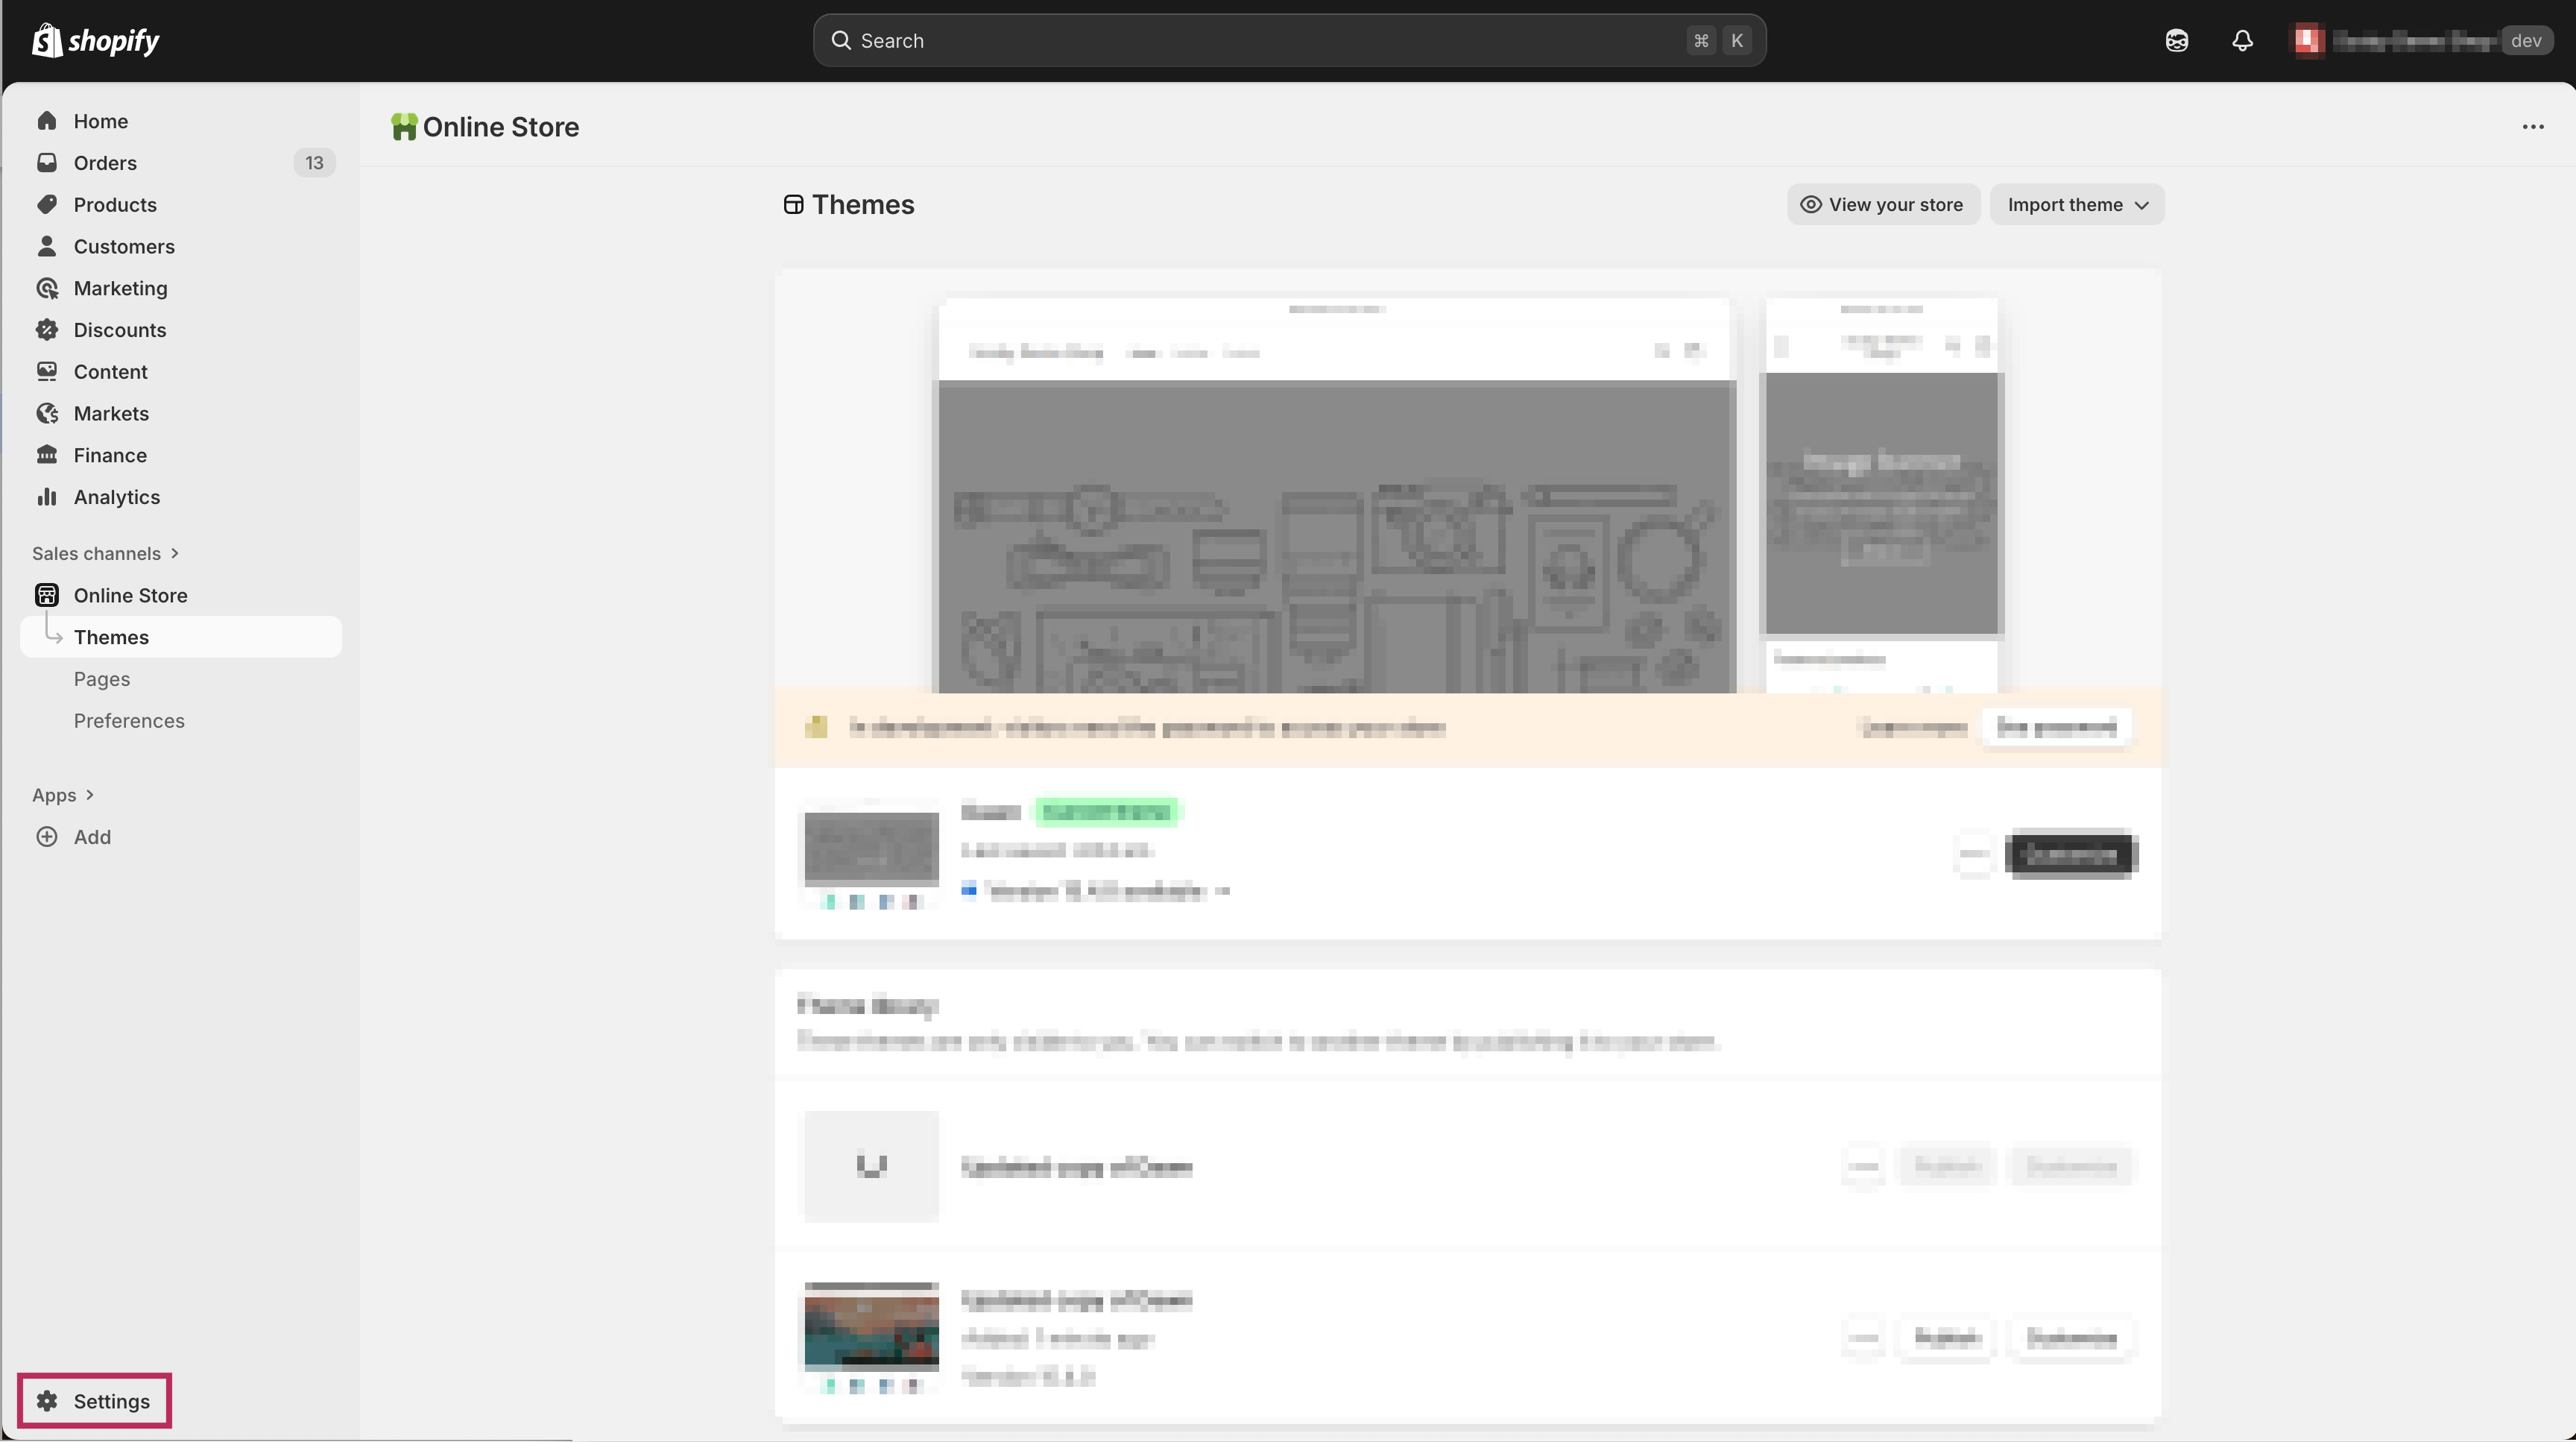
- In your Shopify Admin, click Settings at the bottom left.
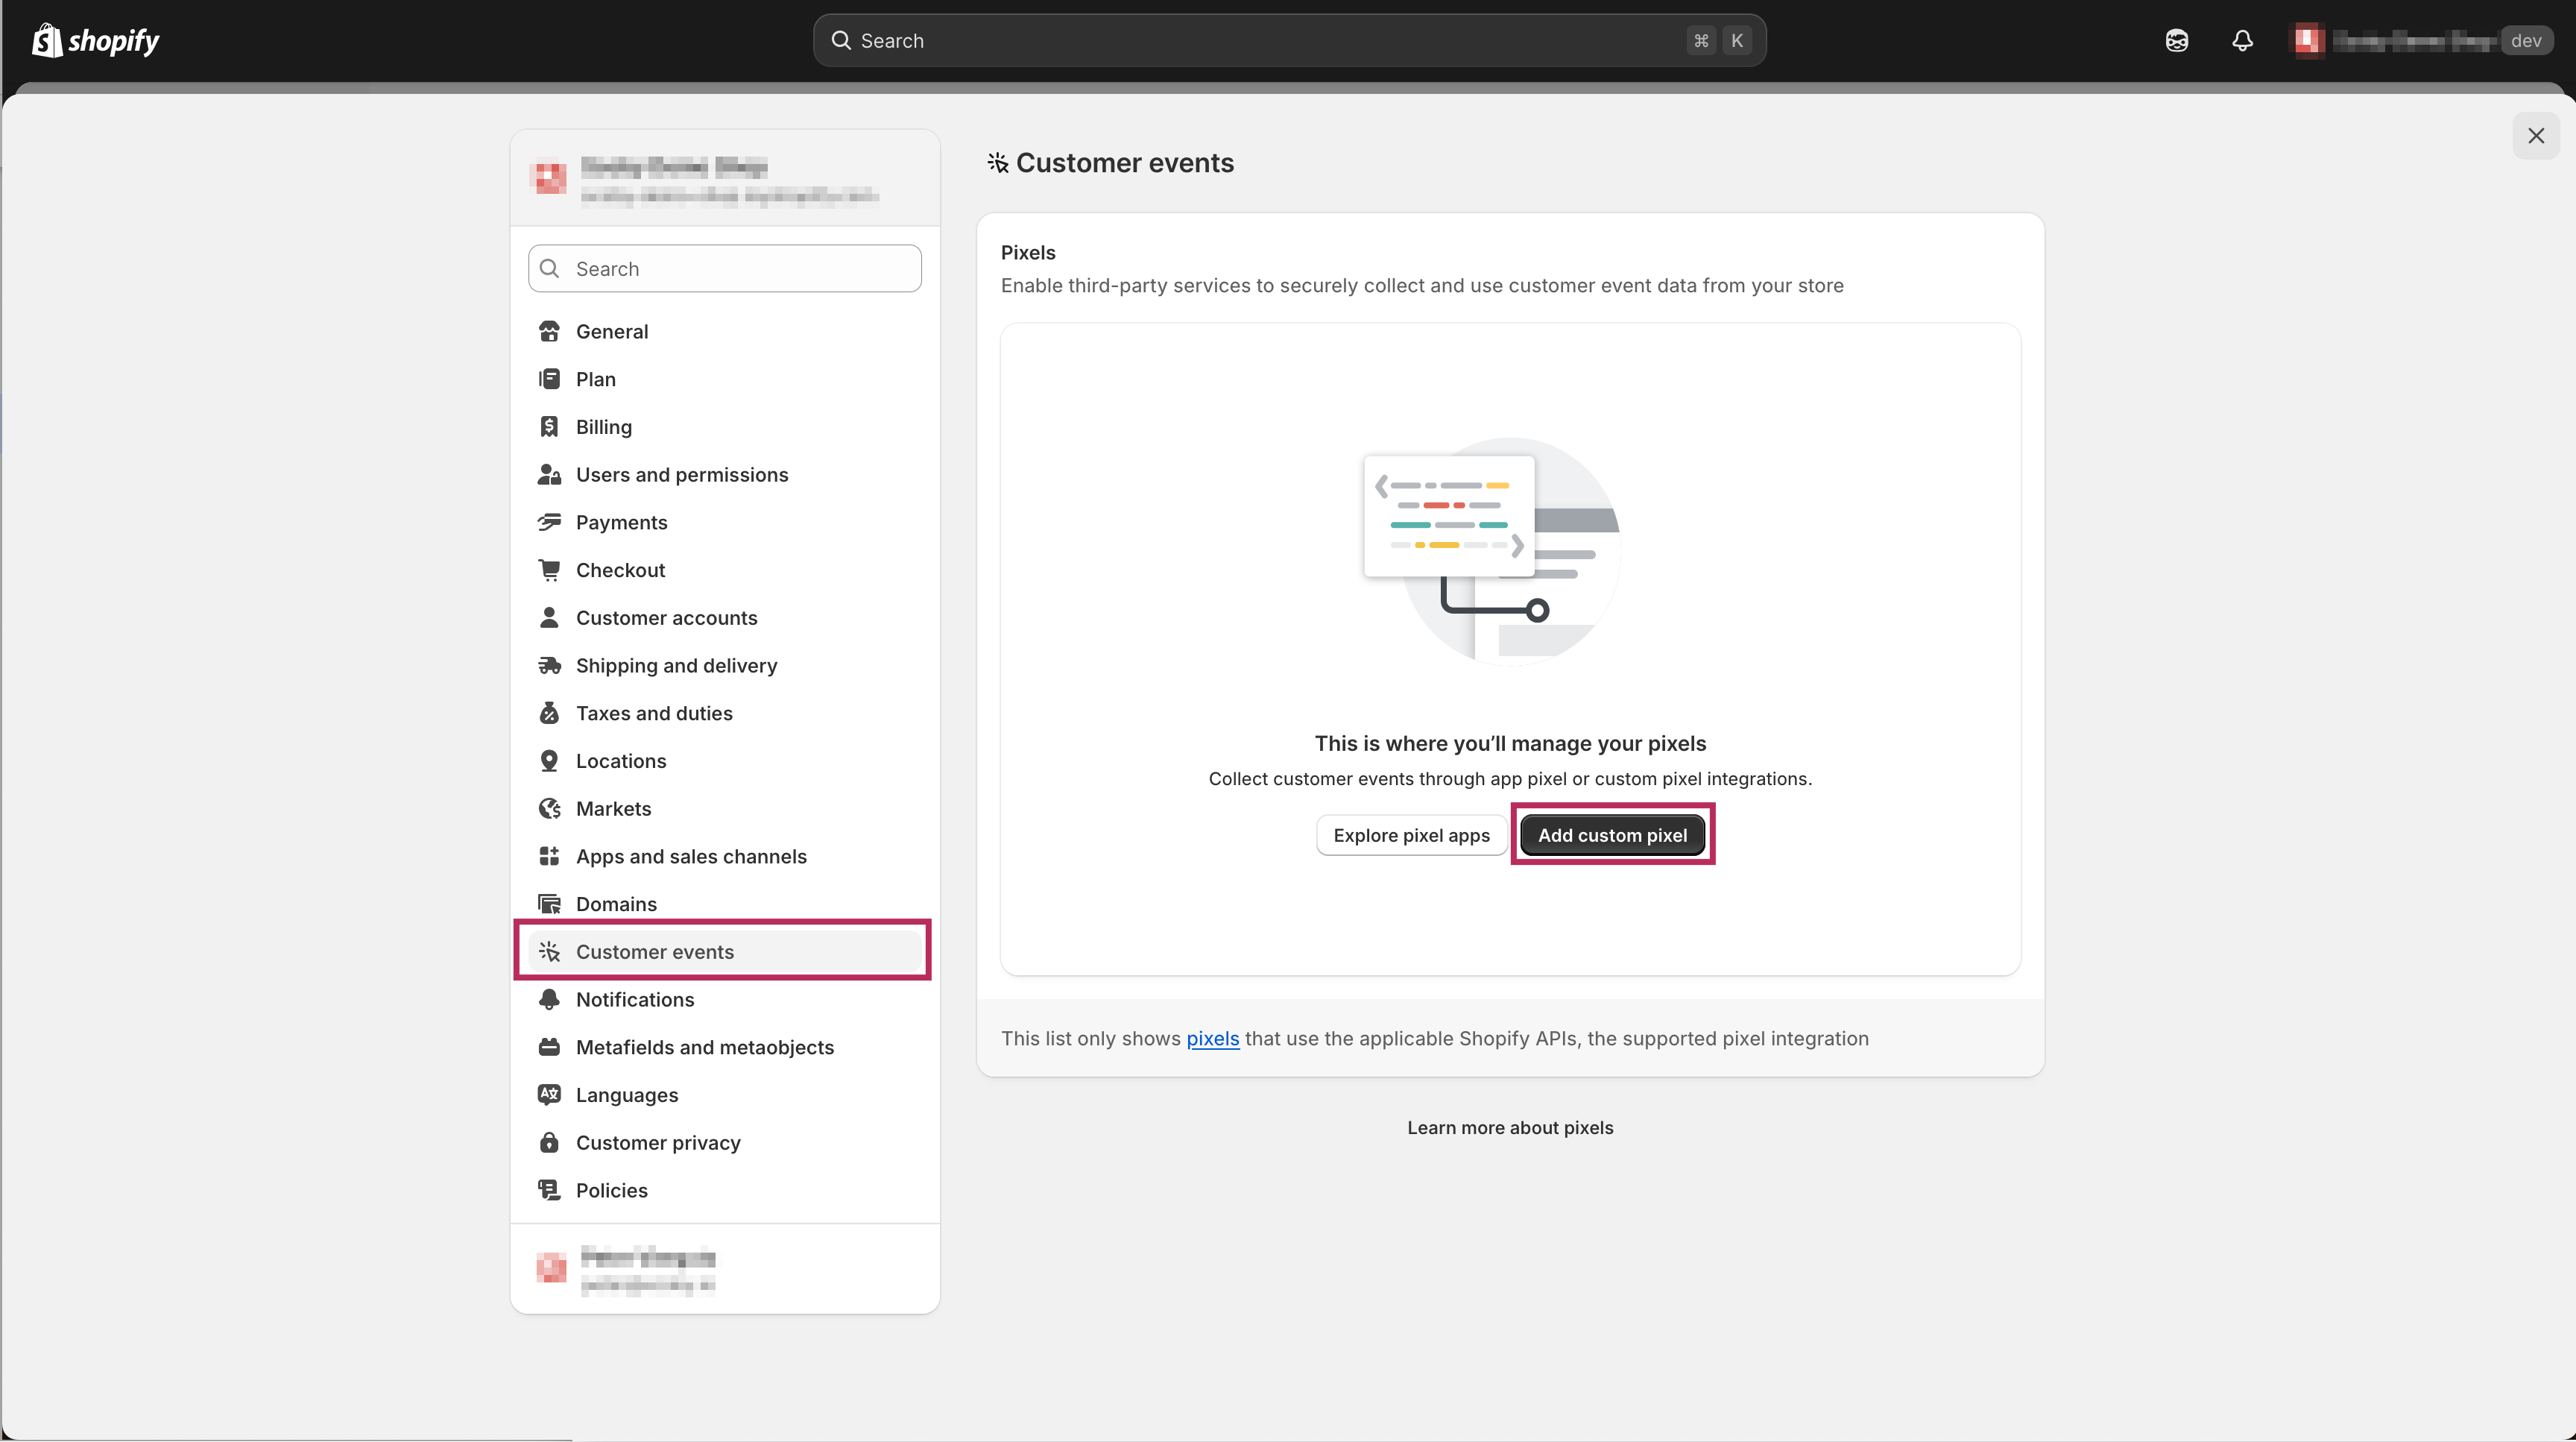
Select Customer events in the left-hand menu.
Click Add custom pixel.
Enter a name for your pixel, for example:
Scoby Analytics.Copy and paste the following code into the Code field.
Replace<WORKSPACE_ID>with your actual Workspace ID from Step 1.
(function () {
  const workspaceId = "<WORKSPACE_ID>";

  window.scoby = window.scoby || function () {
    (window.scoby.q = window.scoby.q || []).push(arguments);
  };
  window.scoby('init', { autoLogging: false });

  analytics.subscribe('page_viewed', (event) => {
    const url = event.context.document.location.href;
    const referrer = event.context.document.referrer;
    window.scoby('logPageView', { url, referrer });
  });

  analytics.subscribe('checkout_completed', (event) => {
    const amount = event.data.checkout.totalPrice.amount;
    const currency = event.data.checkout.currencyCode;
    const goal = "Purchase";
    window.scoby('logConversion', { goal, amount, currency });
  });

  const script = document.createElement('script');
  script.src = `https://${workspaceId}.s3y.io`;
  document.head.append(script);
})();
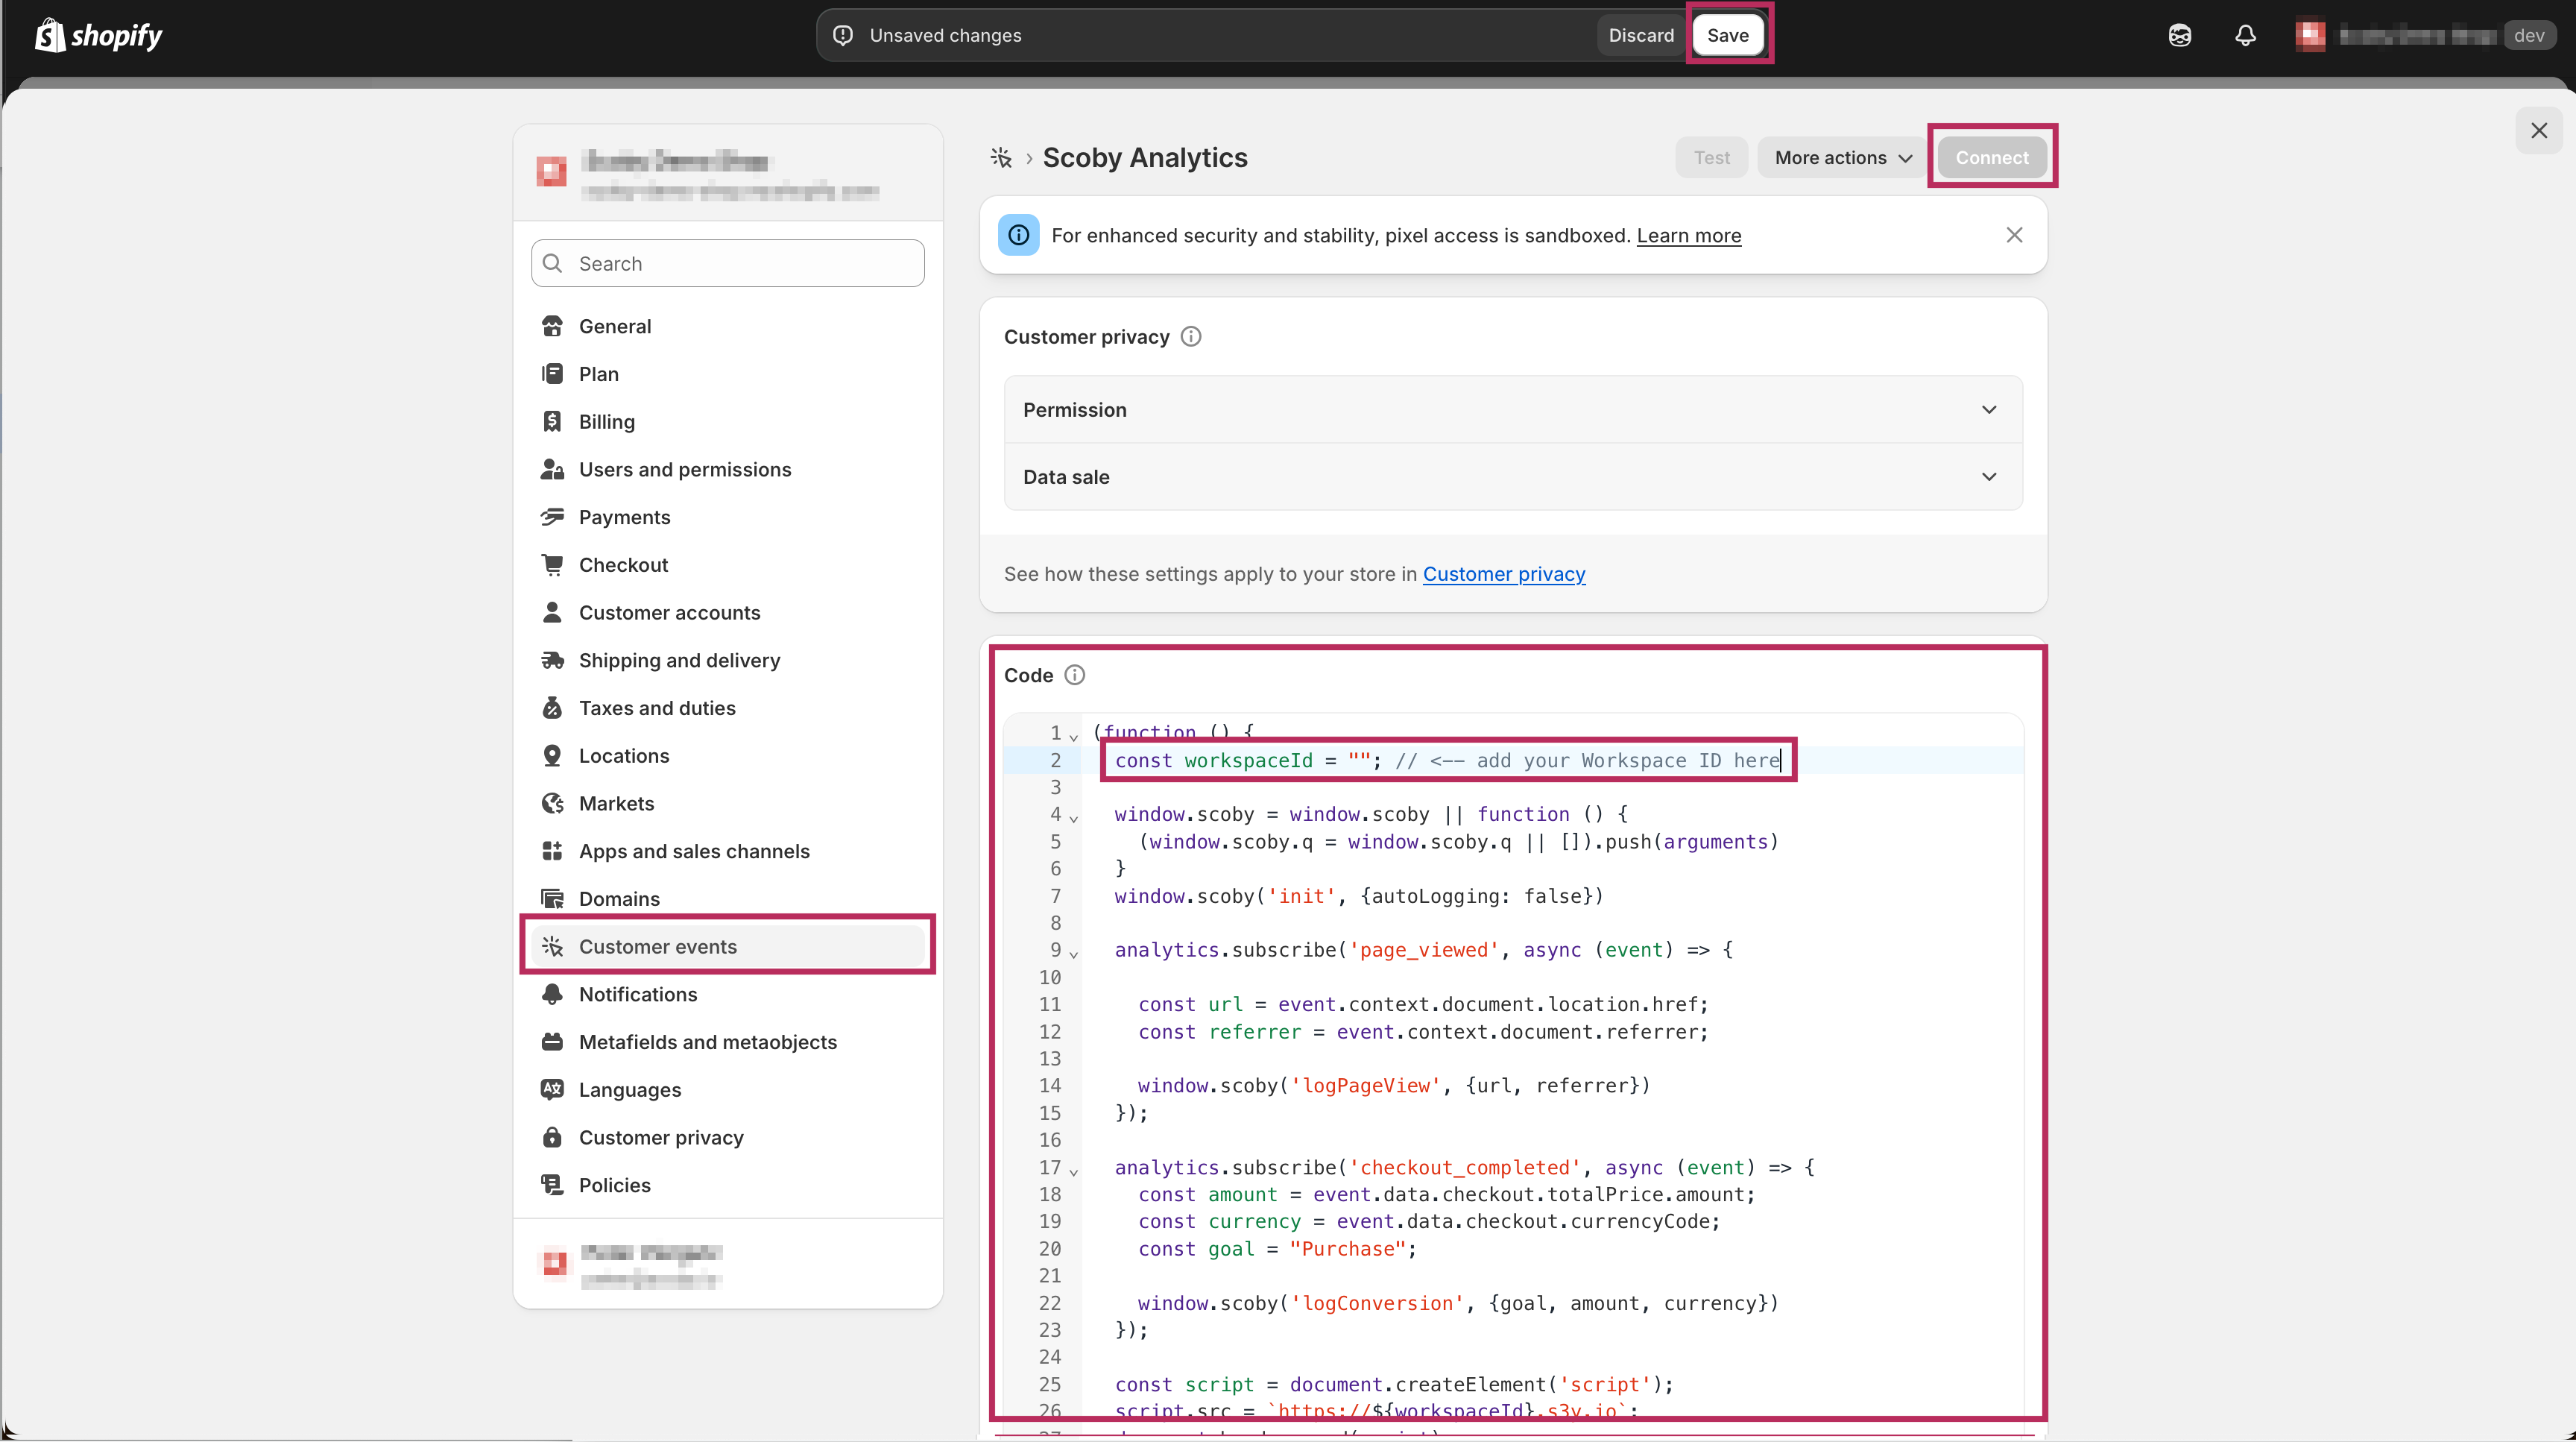
- Click Save, then Connect to activate the pixel.
That’s it 🎉
Scoby Analytics will now start collecting anonymous visit and conversion data from your Shopify storefront. You can view your live statistics in the Scoby Analytics Dashboard shortly after installation.